Configure and use eFaceID
eFaceID helps an organization confirm that the person beginning a protected exam is present and matches the identity photo supplied by an authorized exam administrator. It combines a live camera check with a face comparison and binds the resulting decision to that exam attempt.
This walkthrough uses a fictional Cedar Valley University account, a candidate named Amina Hassan, and BIO 201 — Human Genetics Midterm.
Keep a human fallback
A biometric decision must not be the only way a candidate can access an assessment. Publish a support route and use the built-in non-biometric review workflow for candidates who decline consent, cannot use the camera, or require an accommodation.
Before you start
You need:
- a plan or contract that includes eFaceID;
- Root or Administrator access to enable the organization feature;
- Manager access to enroll candidates and configure the exam;
- one clear, current identity photo for each candidate;
- a supported desktop browser with a working camera; and
- a documented support and non-biometric review process.
Do not use a group photo, scanned document page, filtered selfie, or image with more than one visible face as the enrollment photo.
1. Enable eFaceID for the organization
Open Billing from the account sidebar and find eFaceID verification. Confirm that its status is Enabled. The card also shows the processing location and the successful and review retention periods configured for the organization.
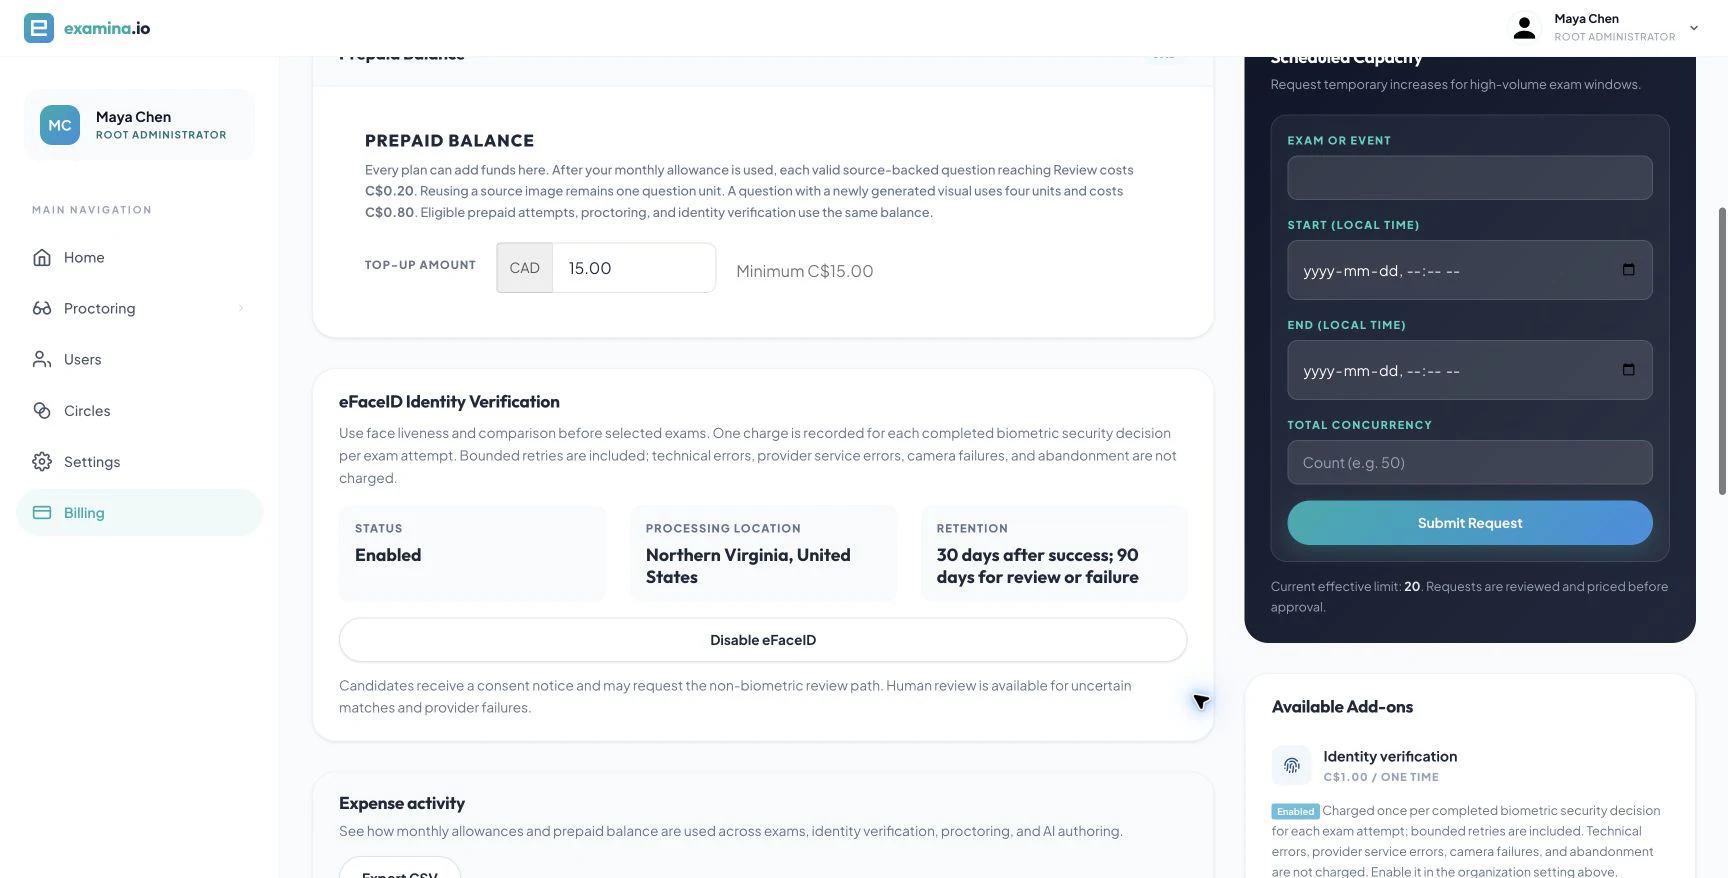
The location is presented as a city or region and country—for example, Northern Virginia, United States. Your organization's location and retention periods can differ from this example.
2. Enroll the candidate's identity photo
In Manager:
- Open Examinees.
- Select the candidate.
- Choose Change Image or the equivalent image action.
- upload a recent, front-facing portrait with even lighting;
- verify the candidate name, code, and exam mapping; and
- save the candidate.
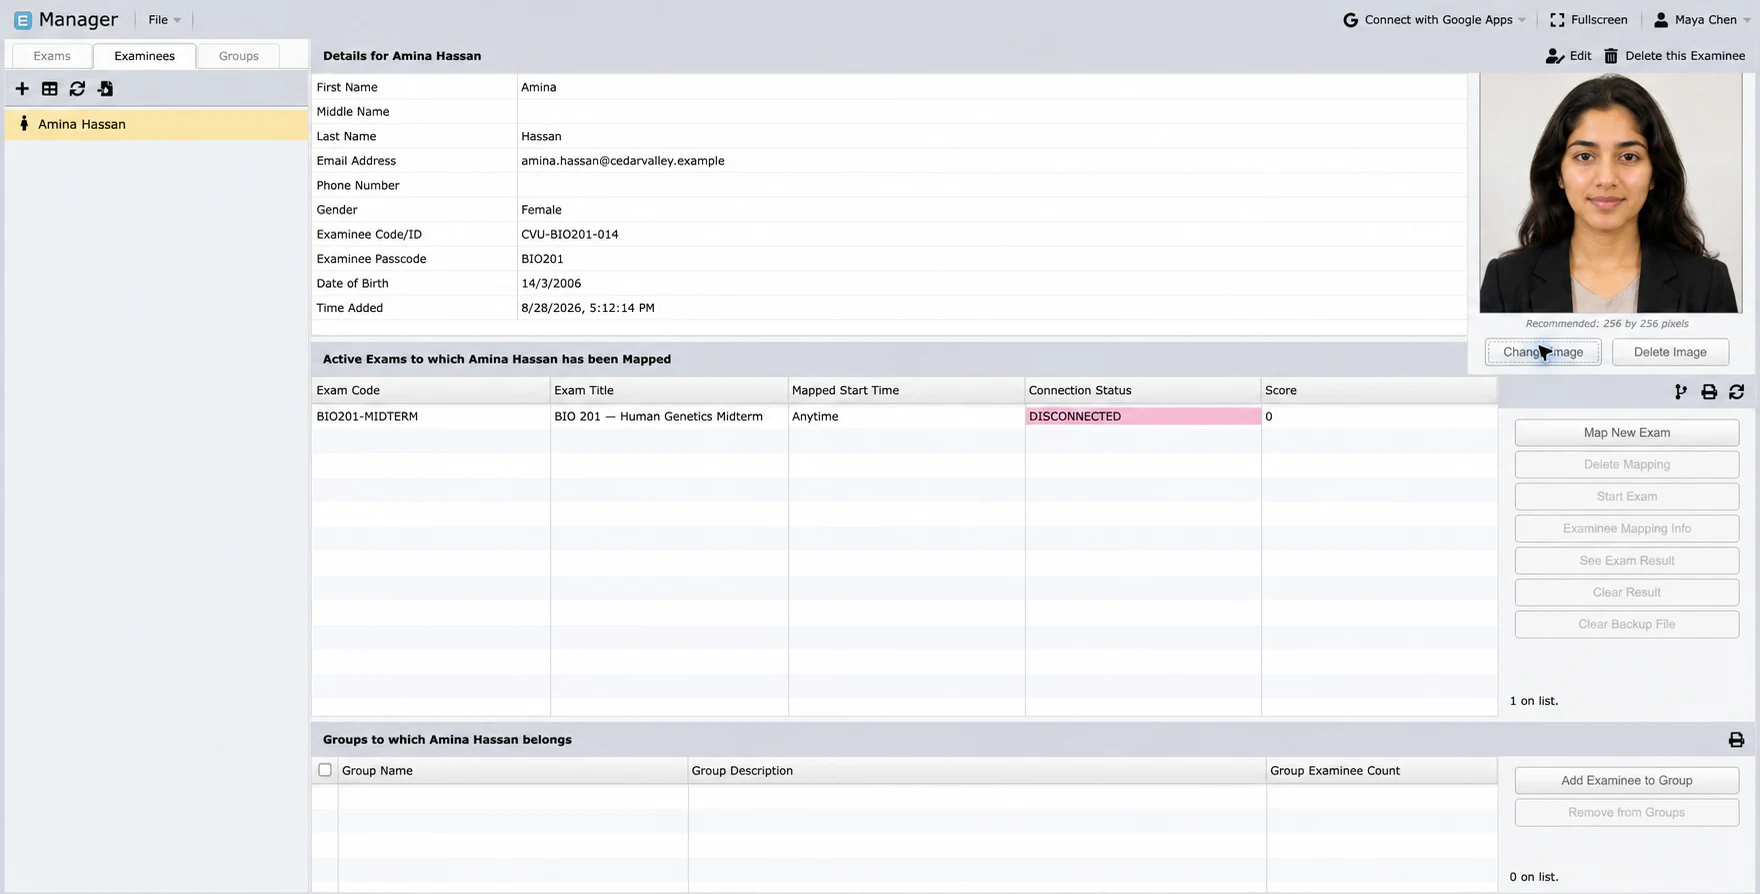
Only authorized administrators can access the enrolled image. Replace it when the candidate's appearance has materially changed or when your organization's identity policy requires a new image.
3. Protect the exam
Open the exam in Manager and select its settings or protection controls. Enable:
- eFaceID Verification to require identity verification before this exam;
- Live Proctoring as well when an invigilator must monitor the sitting; and
- the intended retention and fallback settings for the assessment.
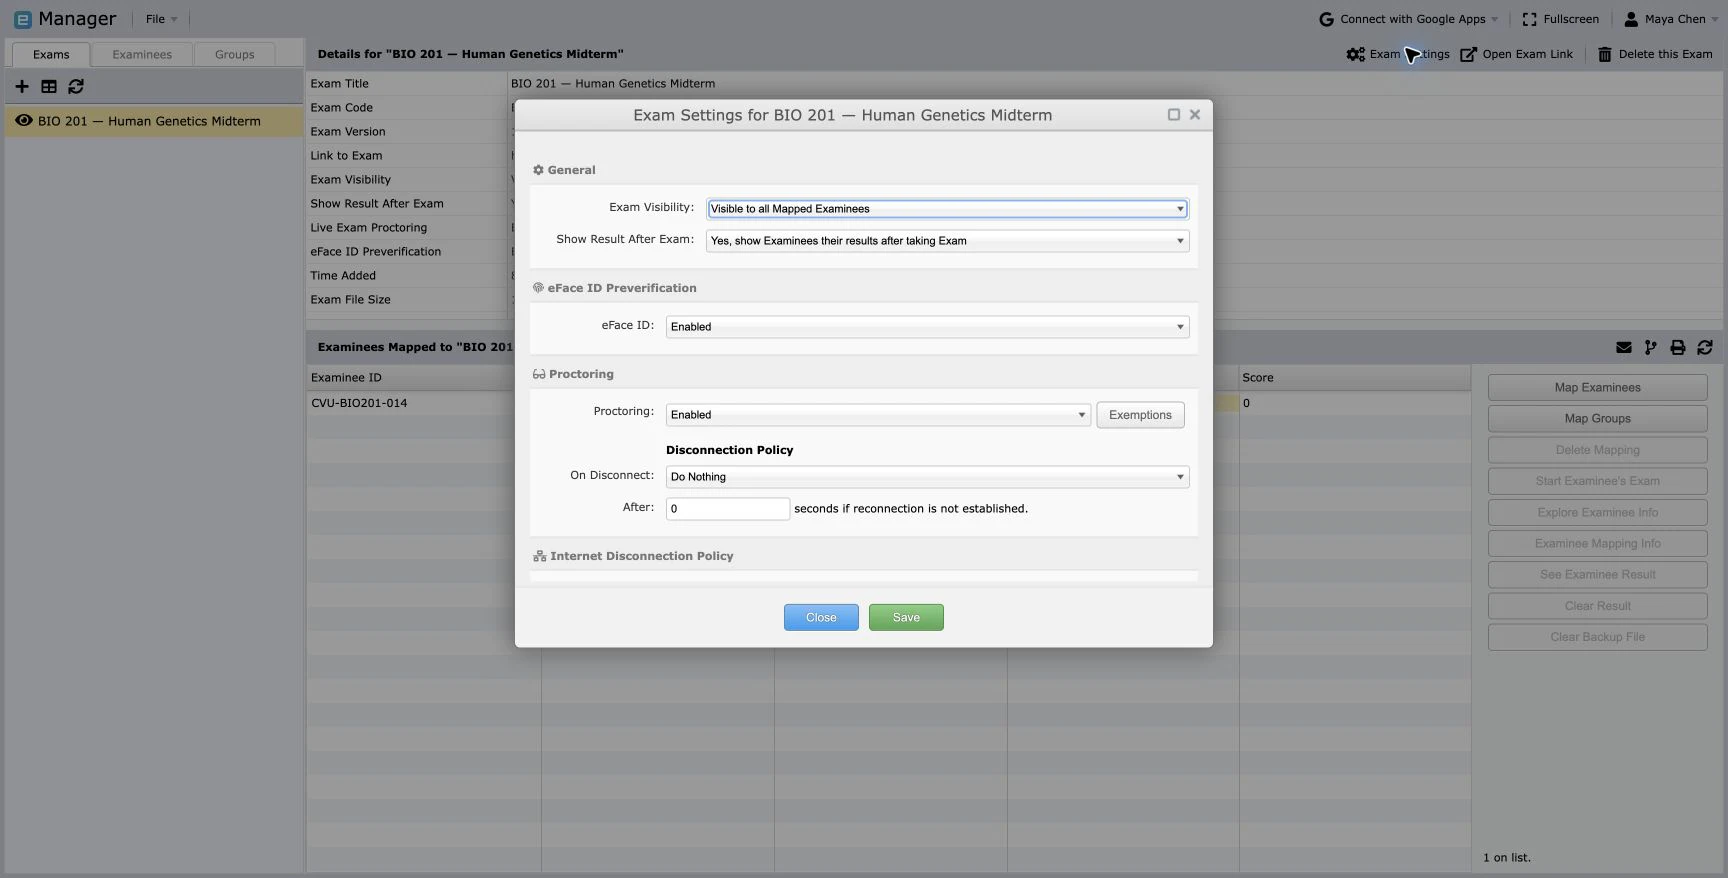
Map every candidate to the correct paper and confirm that each protected candidate has an enrollment image. Test the complete workflow with a fictional candidate before publishing a live assessment.
4. Candidate sign-in
The candidate opens the exam link and enters the code and passcode supplied by the institution.
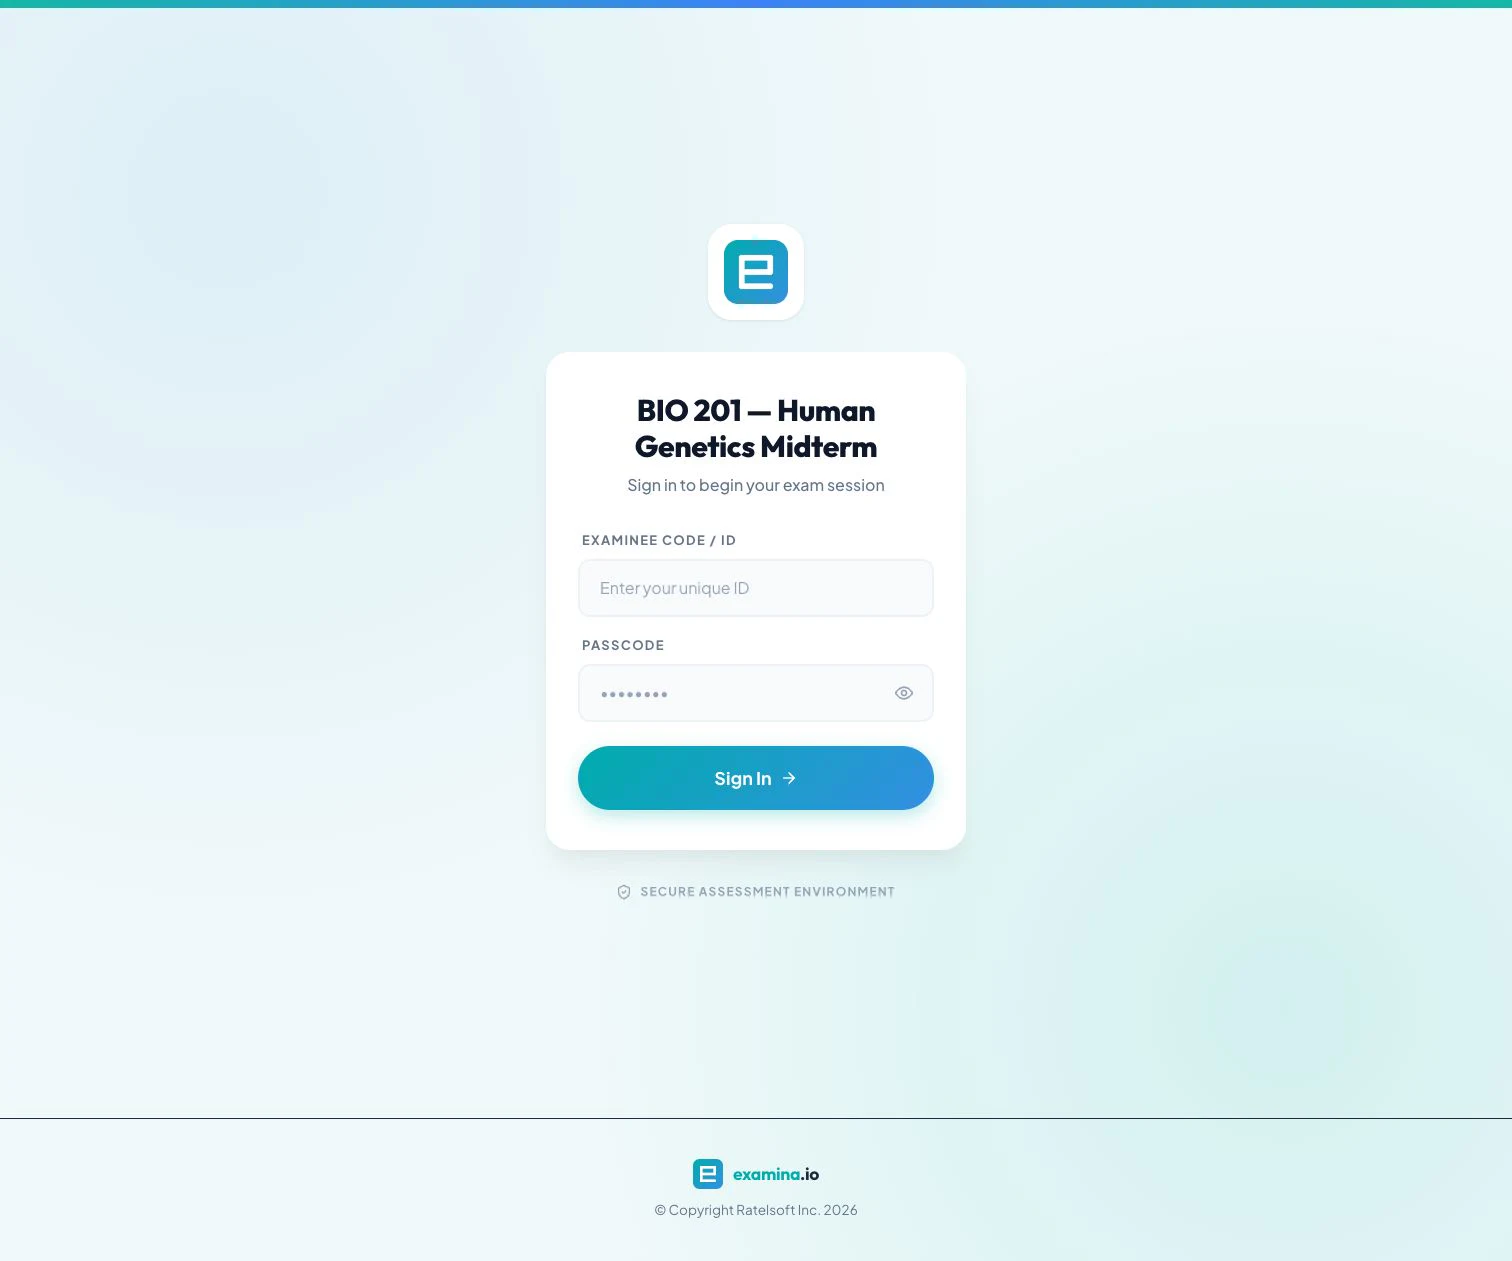
Tell candidates to use one browser window and avoid reopening the same attempt on another device. An active attempt is deliberately protected against a second simultaneous sign-in.
5. Review consent
Before the camera starts, Examina shows:
- why the check is required;
- the processing location;
- successful and review retention periods;
- who can access the decision and enrolled image;
- the photosensitivity warning; and
- the option to request non-biometric review.
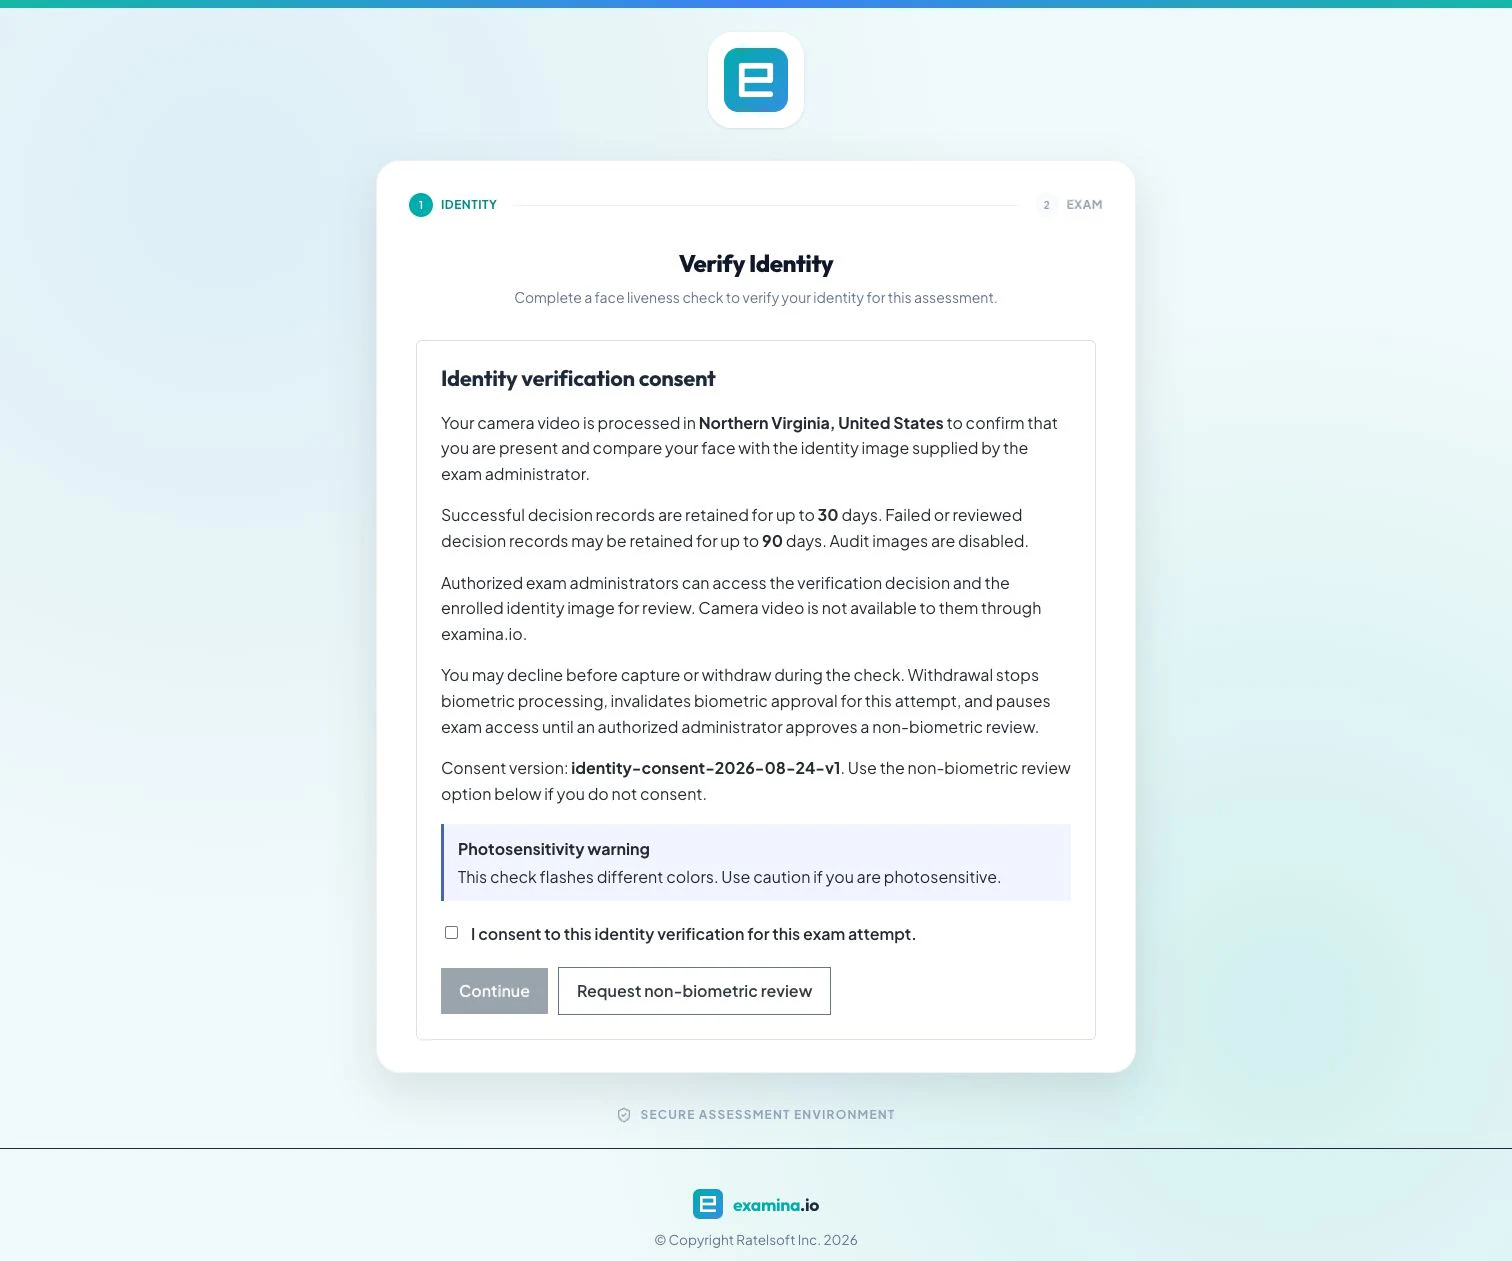
The candidate selects the consent checkbox and chooses Continue. Consent can be withdrawn while the check is running; withdrawal stops biometric processing and pauses exam access for review.
6. Complete the liveness check
The browser requests camera access. The candidate should:
- sit in a well-lit place without strong light behind them;
- remove face coverings or tinted glasses when permitted and appropriate;
- keep only one face in view;
- centre their face inside the guide; and
- follow the on-screen colour and movement prompts until a decision appears.
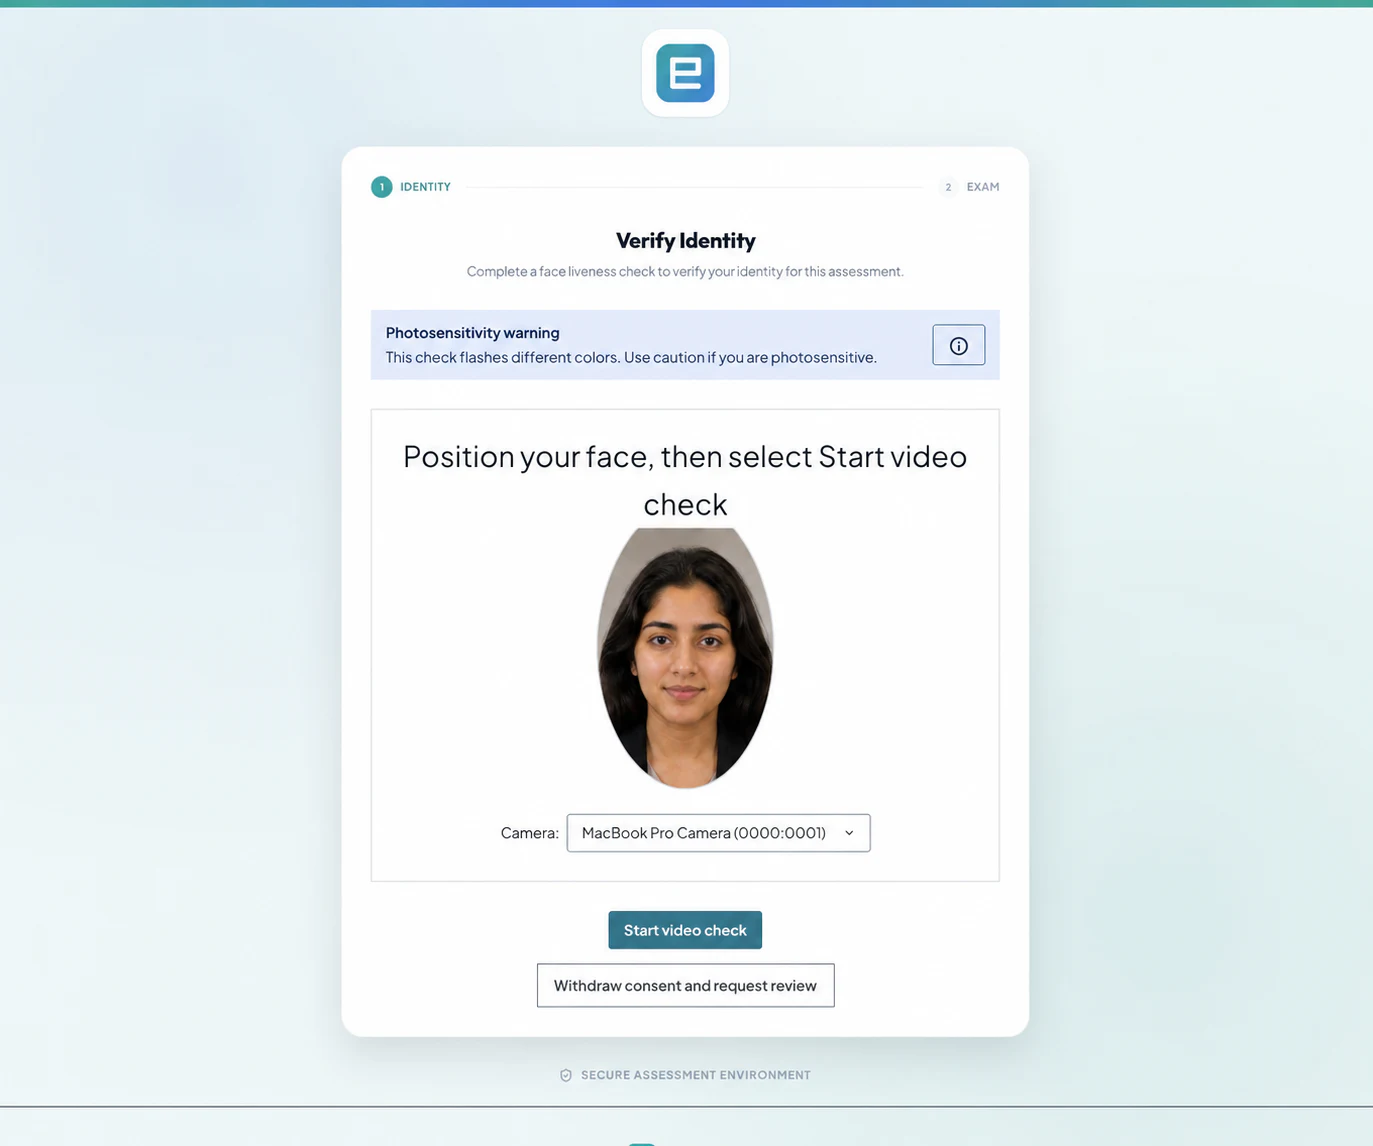
The published screenshot uses a fictional portrait for privacy. The controls and workflow are the same as the tested live check.
7. Understand the outcome
Approved
: The successful decision is bound to this candidate, exam, and attempt. The candidate continues to device setup or the exam overview.
Review required
: The attempt pauses. An authorized administrator reviews the request and decides whether to approve a documented non-biometric path.
Technical failure
: The candidate receives a usable recovery message. Ask them to check camera permission, lighting, browser support, and network connectivity before retrying.
Consent declined or withdrawn
: No biometric approval is issued. The candidate uses Request non-biometric review, and the institution follows its accommodation and identity policy.
Only a completed biometric security decision is billable. Camera permission errors, abandoned capture, and provider or network failures are not successful decisions. Check Billing for the price and included allowance that apply to your organization.
8. Review and audit safely
Authorized staff should record the reason and evidence for a non-biometric approval without copying biometric images into email, chat, or support tickets. Use the decision status, timestamps, candidate record, and institutional identity evidence permitted by your policy.
Successful decision records and review records can have different retention periods. Audit images are not automatically exposed to administrators. The candidate's camera video is not available to administrators through examina.io.
Troubleshooting
The camera prompt never appears
: Allow camera access for the exact exam site, close other applications using the camera, reload the page, and retry. Some operating systems require the browser to be relaunched after a new system permission is granted.
The face is not detected
: Improve front lighting, centre the face, remove background faces, and make sure the full face is visible.
The comparison is sent for review
: Verify that the enrolled photo belongs to the candidate and is recent and clear. Do not repeatedly retry to force an approval; use the documented review path.
The candidate changed browsers
: Identity approval is bound to an attempt session. The candidate may need to complete the check again so an approval from another browser cannot be reused.
For an exam that also uses an invigilator, continue with Live exam proctoring.