Integrate examina.io with Moodle
Connect examina.io to Moodle once, then let teachers add published assessments to their courses without sending learners to a separate login page. Learners open the assessment inside Moodle, and examina.io can return their scores to the Moodle gradebook.
Validate before a live assessment
Connect and validate the complete workflow in a non-production Moodle course with fictional users before enabling it for a live assessment.
The screenshots in this guide use a fictional Northbridge College course, Introduction to Biology, and an assessment named Cell Structure and Function. Your organization, URLs, IDs, and course names will be different.
What the integration provides
- One Moodle sign-in: a learner who opens the activity in Moodle does not sign in to examina.io again.
- Assessment selection: a teacher chooses a published exam through LTI Deep Linking instead of copying an exam URL.
- Course-aware placement: examina.io associates the LMS course and activity with the selected published assessment.
- Grade return: LTI Assignment and Grade Services (AGS) can return the learner's result to the correct Moodle grade item.
- Optional course roster: Names and Roles Provisioning Services (NRPS) can provide a minimal course roster when your institution enables it.
Before you start
You need:
- a Root or Administrator account in examina.io;
- a Moodle site-administrator account;
- a teacher account for the Moodle course;
- at least one exam that has been imported and published in examina.io Manager;
- public HTTPS addresses for Moodle and examina.io; and
- permission to configure an LTI 1.3 external tool and its services in Moodle.
Ensure both systems have accurate clocks. LTI login messages are time-bound, and a large clock difference can cause an otherwise valid launch to fail.
How the two systems exchange settings
Moodle creates the Client ID and Deployment ID that examina.io needs. Examina.io then creates the registration-specific public-key URL that Moodle needs. For that reason, initial configuration has two passes:
- create a provisional external tool in Moodle;
- copy Moodle's registration details into examina.io;
- copy the final examina.io endpoints back into Moodle; and
- activate the registration and test the complete flow.
Do not launch a provisional tool
If Moodle requires a public-key URL during the first pass, use a temporary
HTTPS key-set endpoint controlled by your institution. It may return an
empty JSON Web Key Set ({"keys":[]}). Do not make the tool available to
courses or attempt a launch until you have replaced it with the exact
examina.io Public key set (JWKS) URL in Step 4.
1. Create the provisional Moodle tool
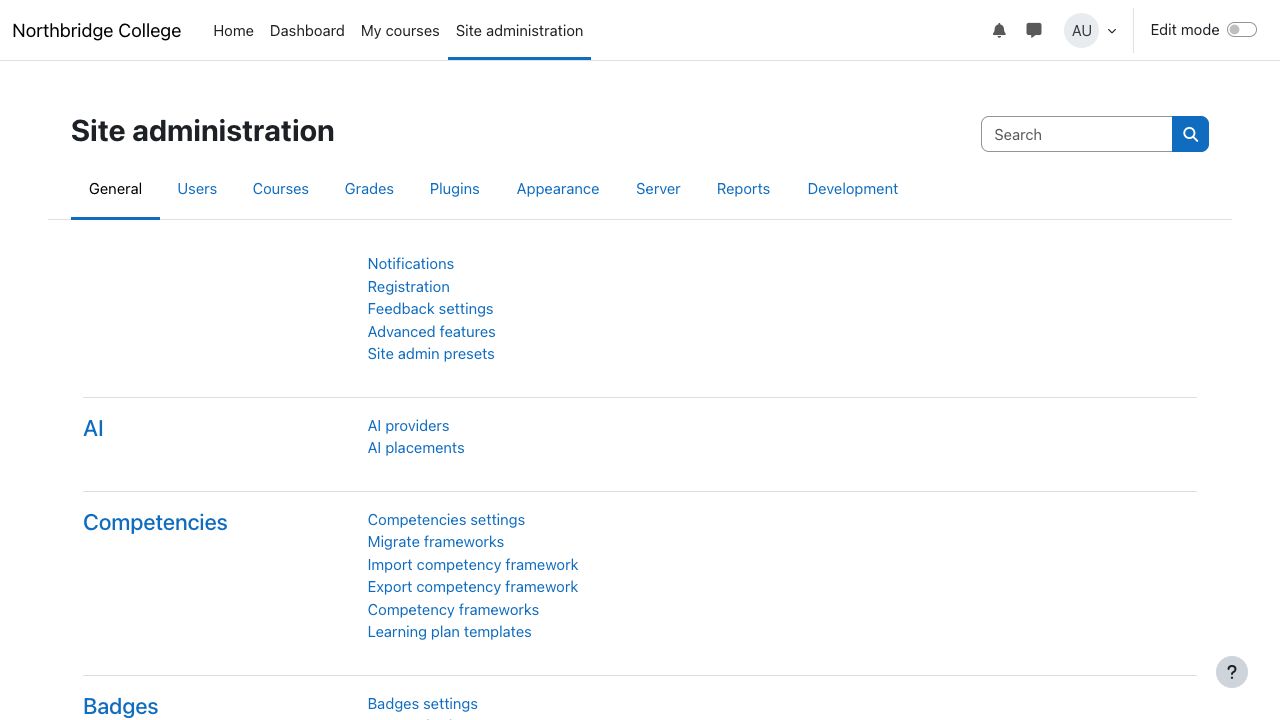
Sign in with a Moodle site-administrator account and open Site administration from the main navigation.
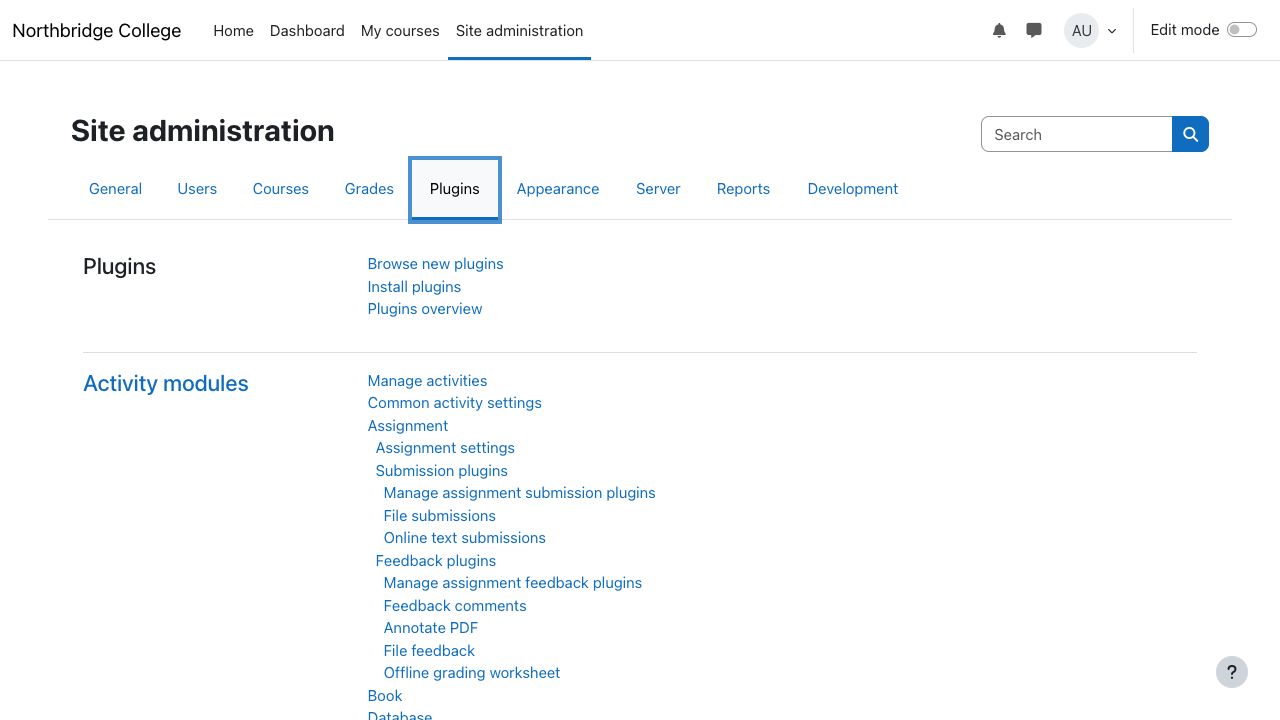
Select the Plugins tab. Under Activity modules, select External tool.
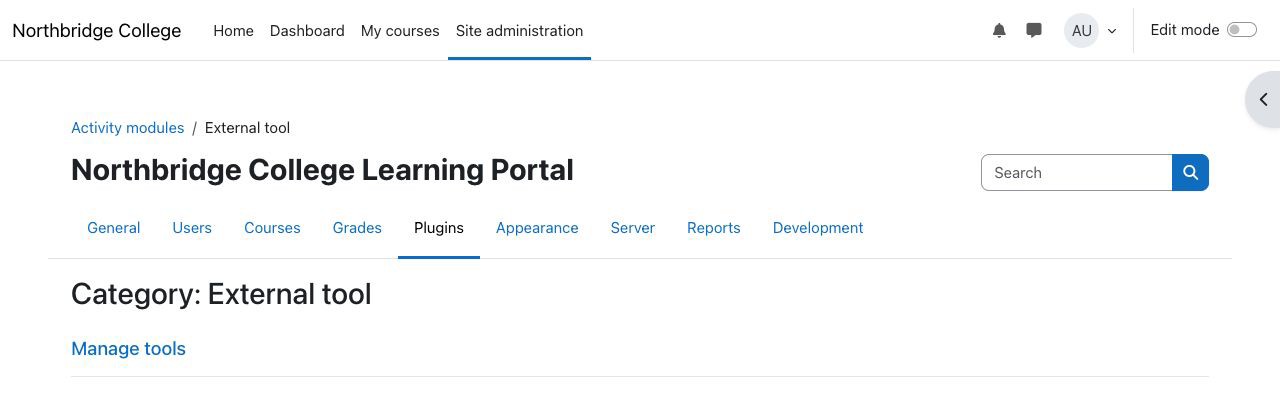
On the External tool settings page, select Manage tools.
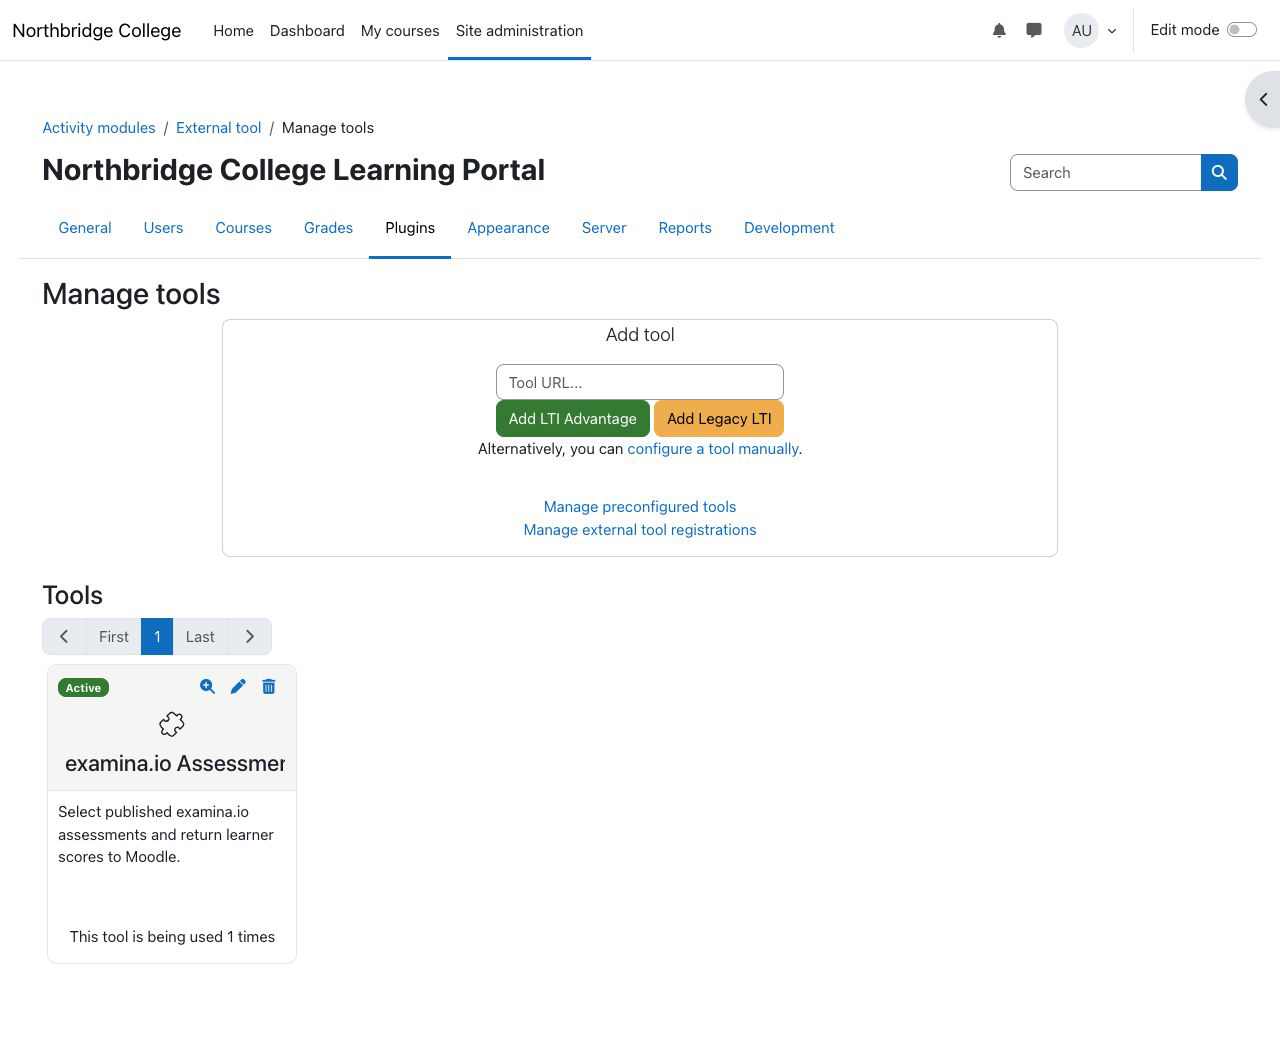
Select Configure a tool manually. If another examina.io tool already exists, edit it instead of creating a duplicate.
Complete the tool form:
- Enter examina.io Assessments as the tool name.
- Enter
https://www.examina.io/lti/launchas the Tool URL. - Set LTI version to LTI 1.3.
- Set Public key type to Keyset URL.
- Enter the provisional key-set URL described above.
- Enter
https://www.examina.io/lti/loginas the Initiate login URL. - Add the launch and Deep Linking URLs as separate Redirection URI(s):
https://www.examina.io/lti/launchandhttps://www.examina.io/lti/deep-link. - Enable Supports Deep Linking and enter
https://www.examina.io/lti/deep-linkas the Content selection URL. - Keep the tool hidden from the activity chooser until configuration is complete, then save it.
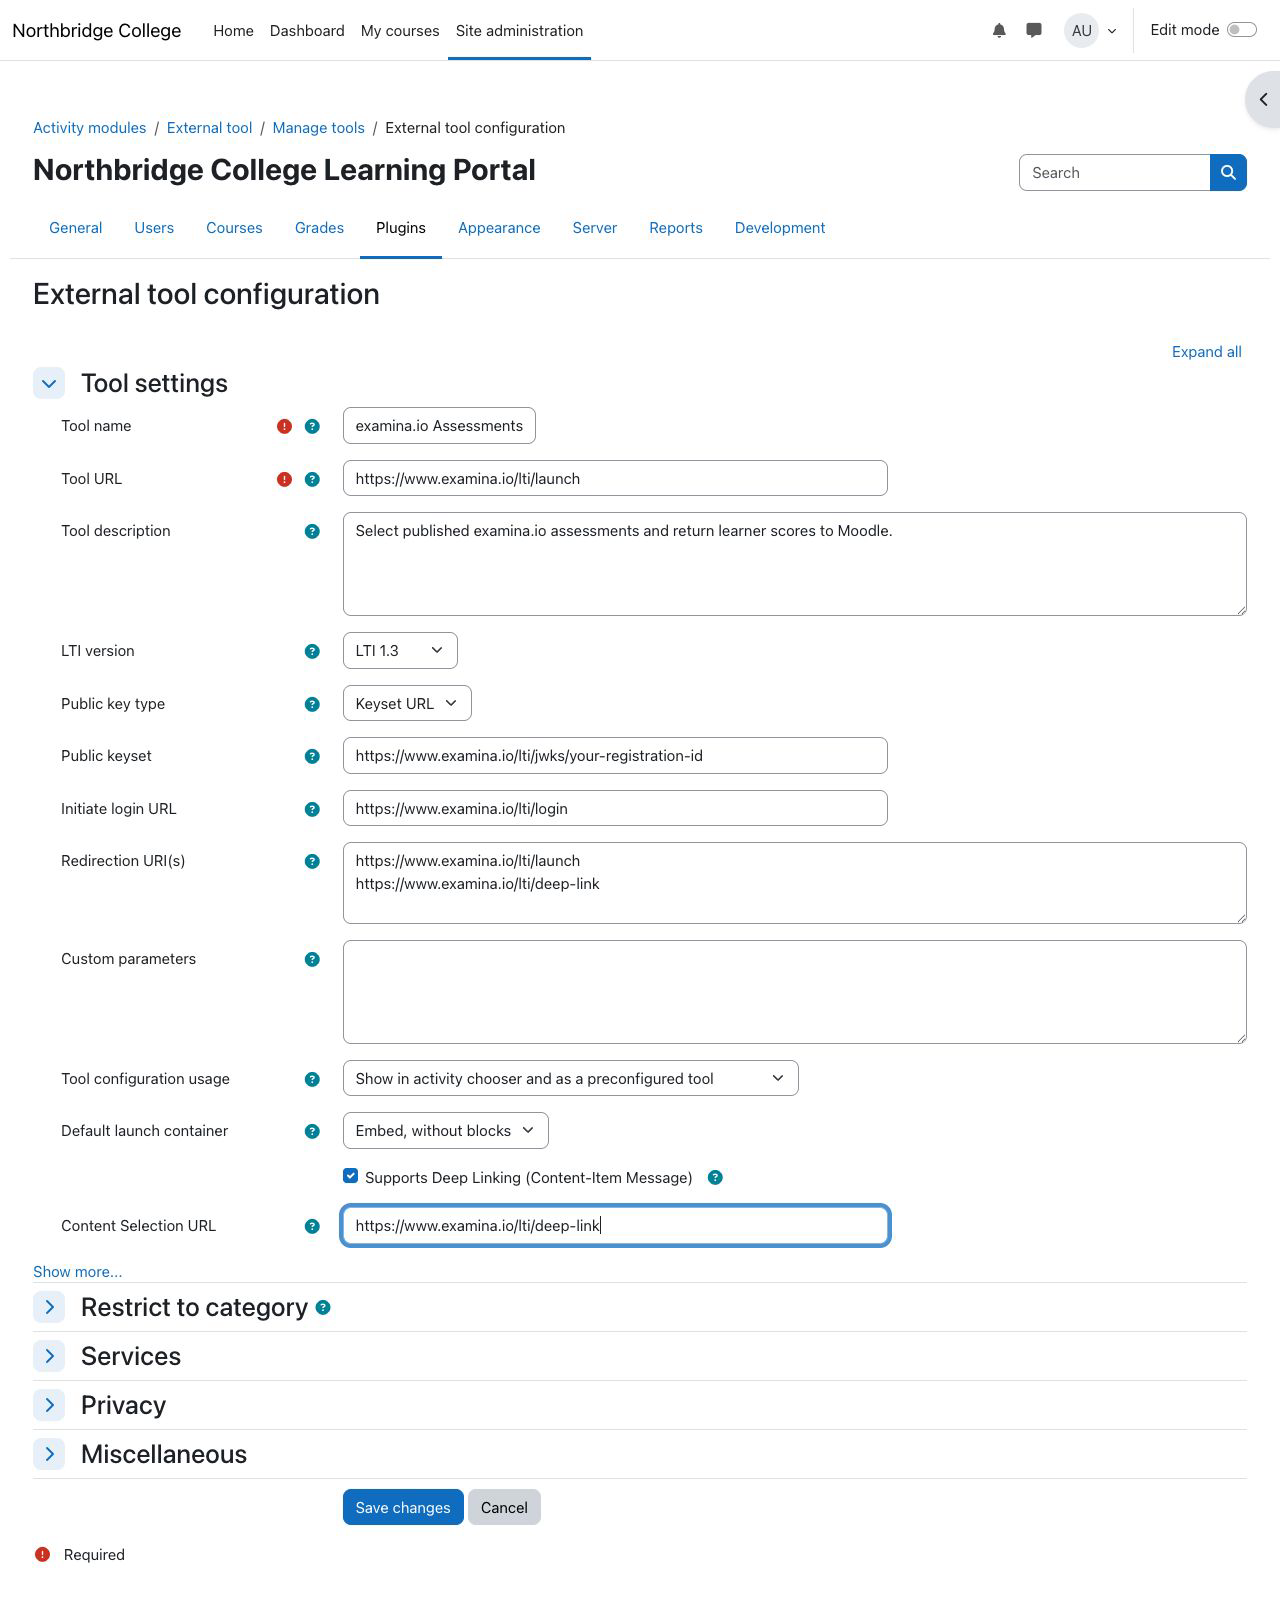
The JWKS value in the screenshot is an example
your-registration-id is a placeholder, not a value to copy. After you
save the Moodle details in examina.io, replace that entire URL with the
exact Public key set (JWKS) URL shown on the saved registration card.
Moodle now assigns the tool identity needed by examina.io.
2. Copy Moodle's registration details
Return to Manage tools, find examina.io assessments, and select View configuration details. Keep this page open while you configure examina.io.
Copy these Moodle values into the matching examina.io fields:
| Moodle configuration detail | examina.io registration field |
|---|---|
| Platform ID | Issuer URL |
| Client ID | Client ID |
| Deployment ID | Deployment ID |
| Authentication request URL | Authorization endpoint |
| Access token service URL | Token endpoint |
| Public keyset URL | LMS public keys (JWKS) URL |
Treat the identifiers as configuration data. Do not put access tokens, private keys, user launch messages, or passwords in documentation or support tickets.
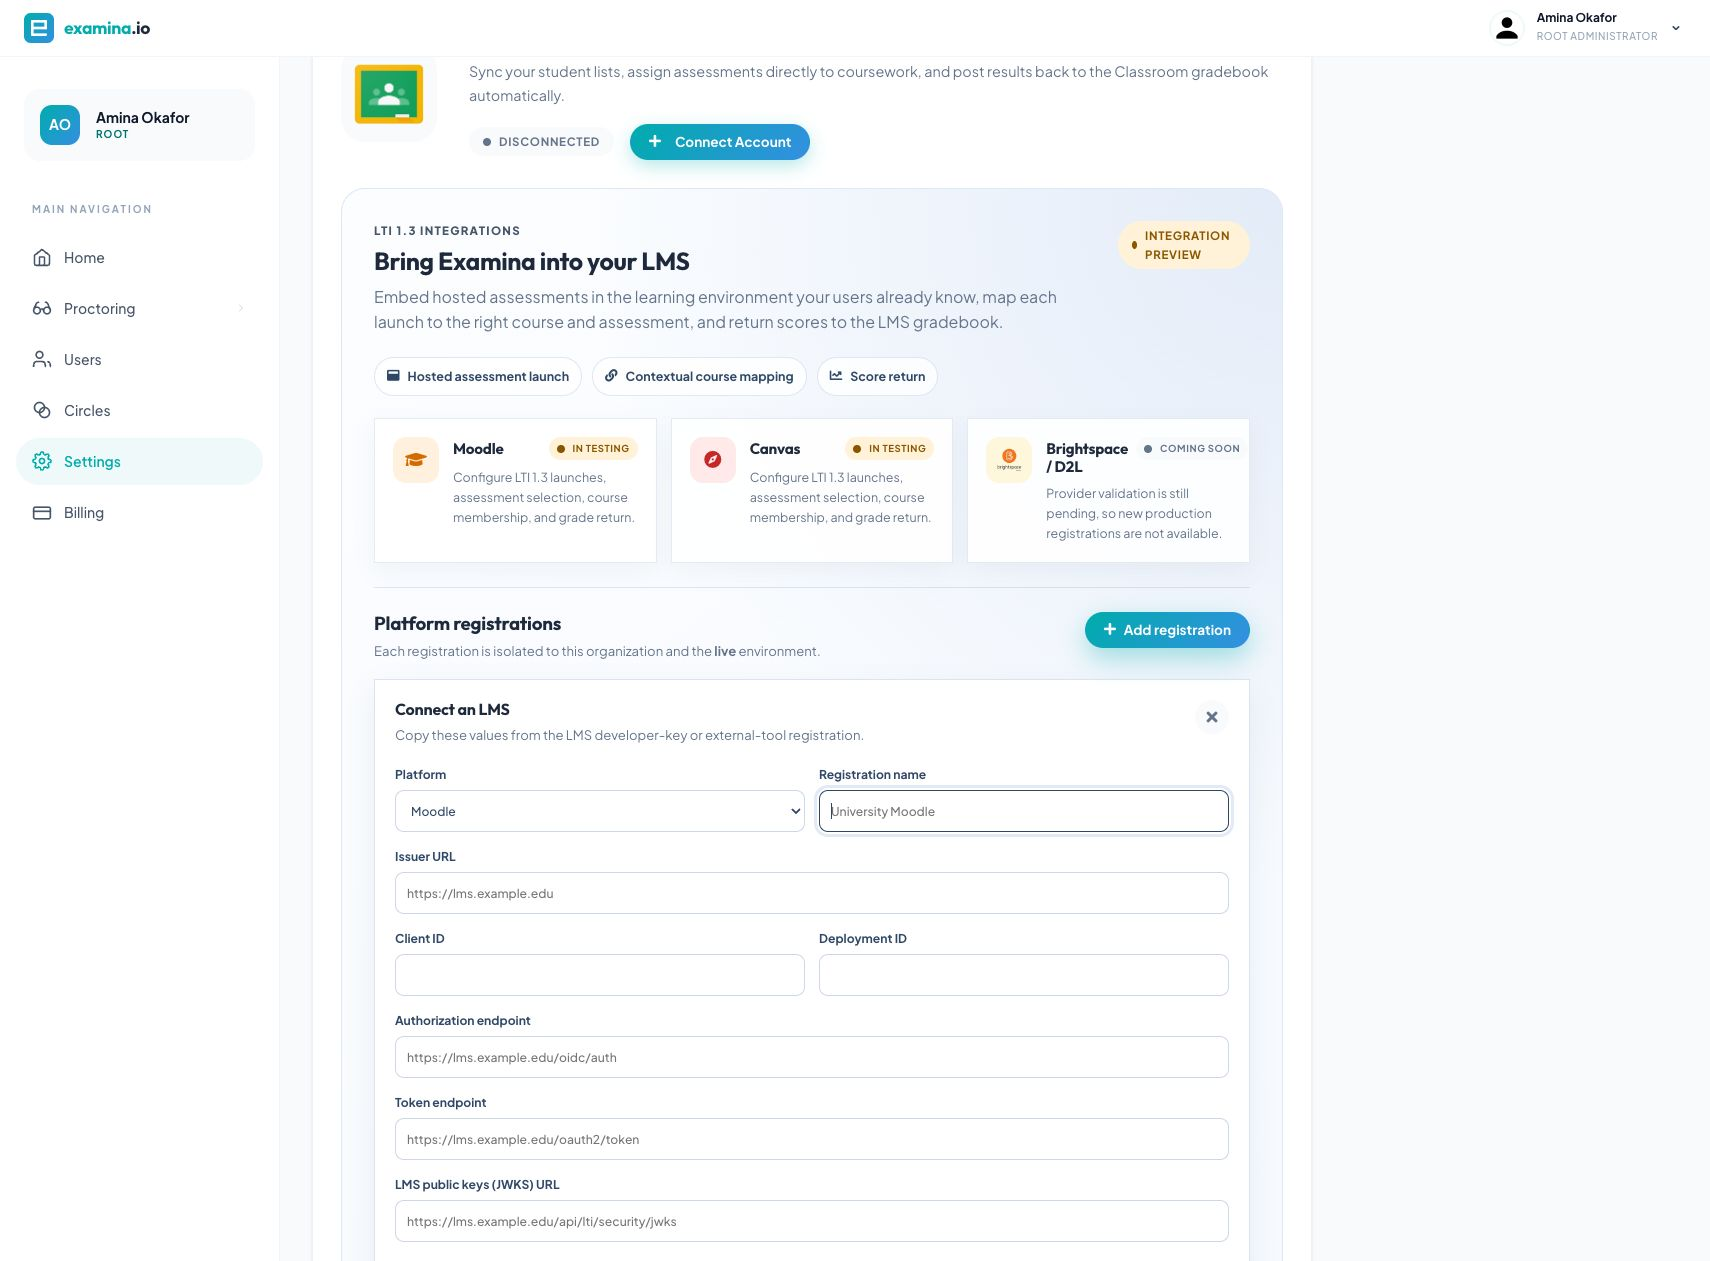
3. Add the Moodle registration in examina.io
As an examina.io Root or Administrator:
- Open Home → Settings.
- Find Bring Examina into your LMS.
- Select Add registration.
- Choose Moodle and enter a descriptive name, such as Northbridge College Moodle.
- Paste the six Moodle values from Step 2.
- Enable only the services that you will also grant in Moodle:
- Assessment selection (Deep Linking) lets teachers choose a published exam from within the Moodle activity form.
- Grade return (AGS) sends completed results to the Moodle gradebook.
- Course roster (NRPS) reads course membership when your workflow needs it.
- Select Save registration.
The saved registration card displays the exact OIDC login initiation, LTI launch, Deep Linking, and registration-specific Public key set (JWKS) endpoints. Keep the card open for the next step.
4. Finish the Moodle tool
Edit examina.io assessments in Moodle and replace every provisional value with the exact value shown by examina.io:
| Moodle external-tool field | Value from examina.io |
|---|---|
| Tool URL | LTI launch URL |
| Initiate login URL | OIDC login initiation |
| Redirection URI(s) | LTI launch URL and Deep Linking URL, one per line |
| Public keyset | Public key set (JWKS) |
| Content selection URL, when shown | Deep Linking URL |
Then configure the Moodle services and privacy settings:
- Enable IMS LTI Assignment and Grade Services if you enabled Grade return (AGS) in examina.io.
- Allow the tool to accept grades from Moodle's delegated service settings.
- Enable Names and Role Provisioning Services only if you enabled Course roster (NRPS) and your institution permits roster access.
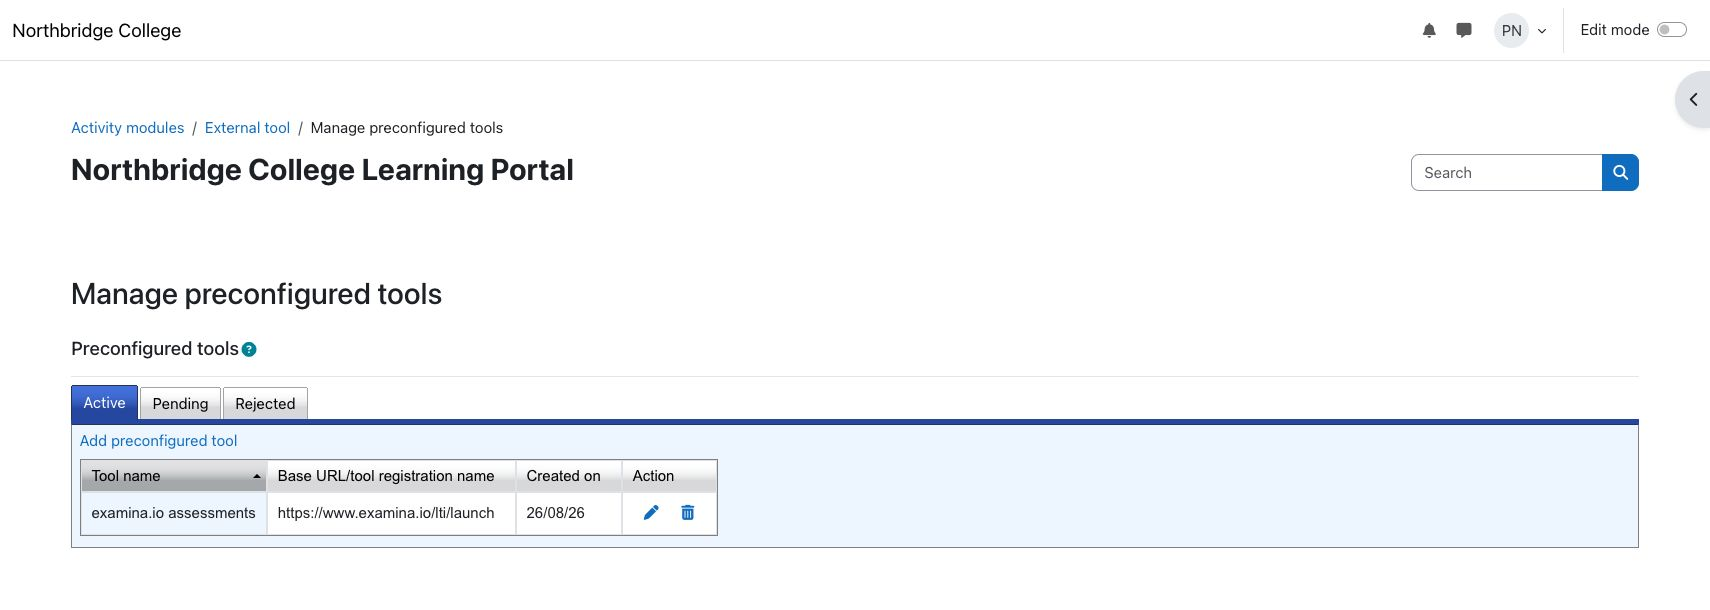
- Make the tool available in the activity chooser after the endpoint and service settings are complete.
- Use Embed as the default launch container if you want the assessment to remain inside the Moodle course page.
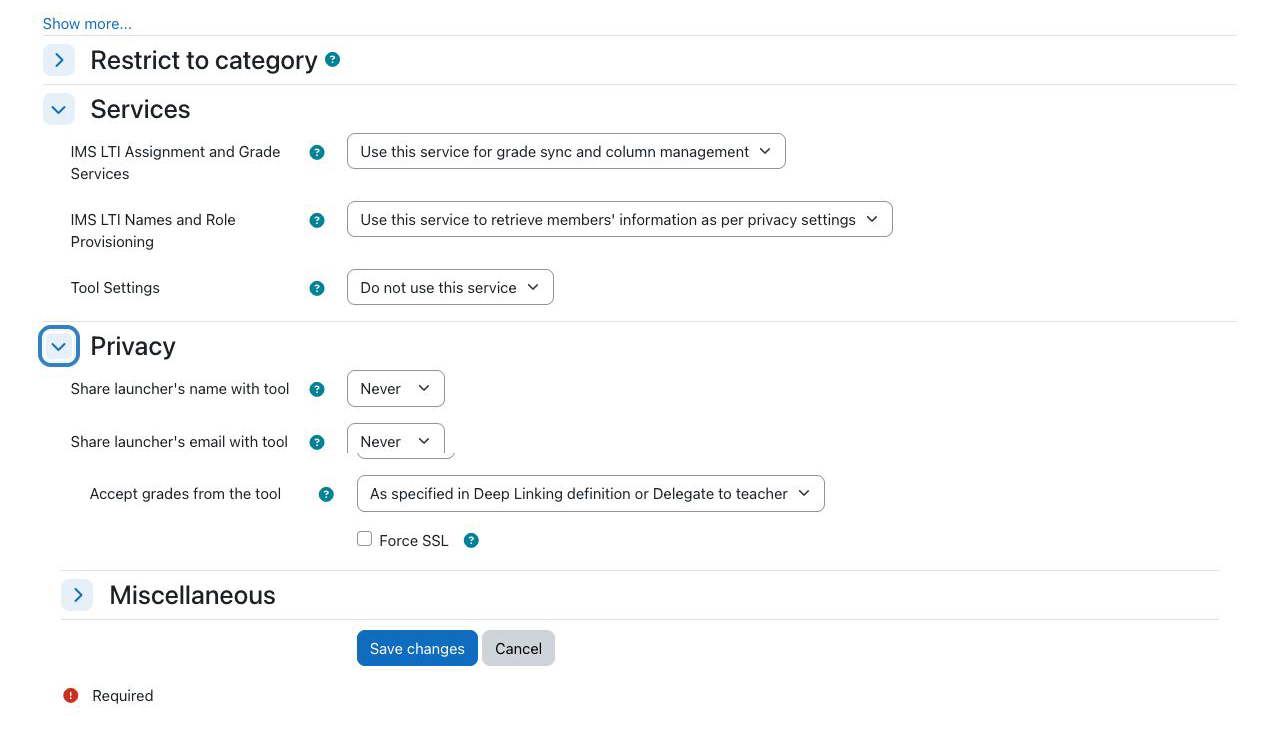
Sharing a Moodle display name or email address is optional. Examina.io can map an LTI learner using the platform's pseudonymous subject identifier. Enable additional profile fields only when your institution has a documented need and lawful basis for sharing them.
Return to examina.io and activate the registration. A suspended or revoked registration cannot accept new launches.
5. Add a published assessment to a Moodle course
As a teacher in the destination course:
- Turn Edit mode on.
- Select Add an activity or resource in the desired course section.
- Choose External tool or the preconfigured examina.io assessments tool.
- Enter the learner-facing activity name.
- Select Select content.
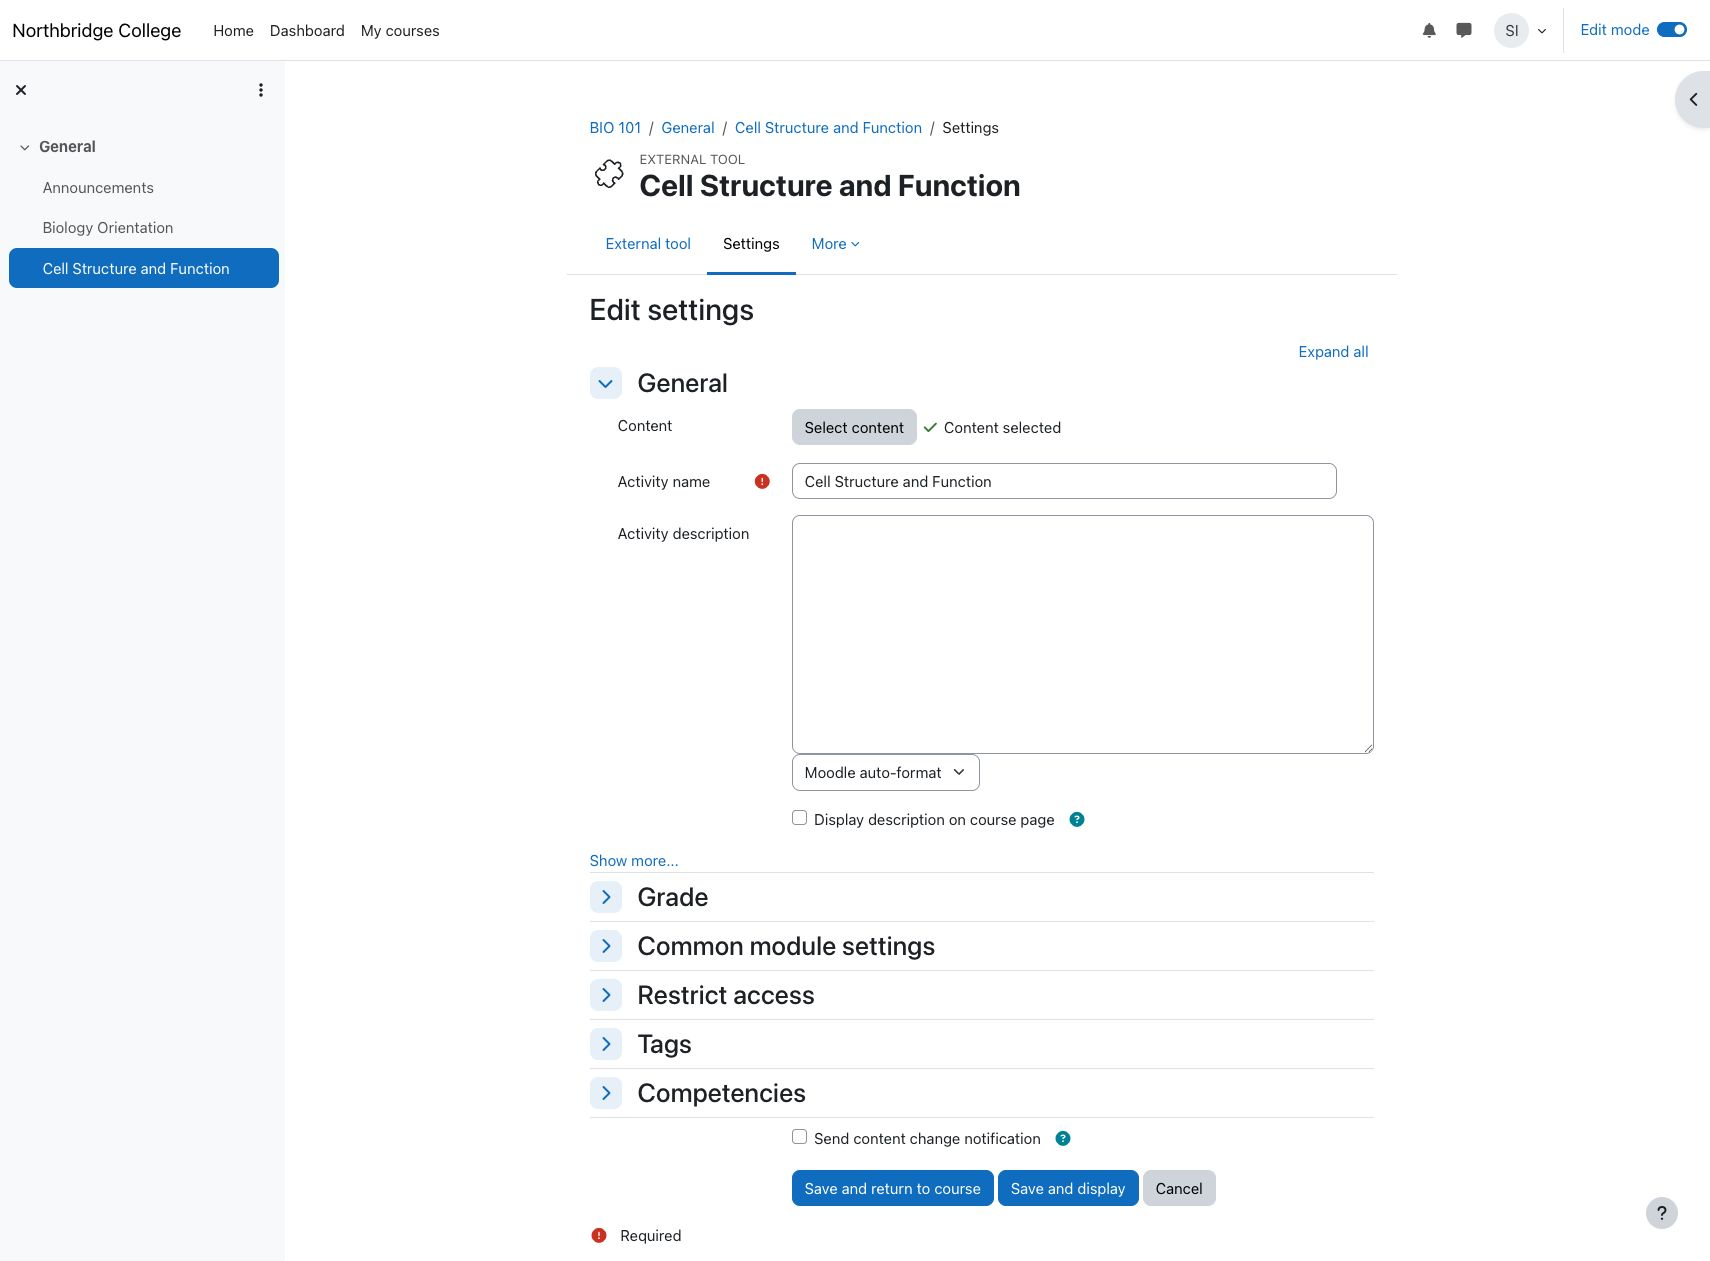
Examina.io opens a list of published assessments that the instructor may use. Choose the intended assessment and confirm the selection. In this example, the teacher chooses Cell Structure and Function for Introduction to Biology.
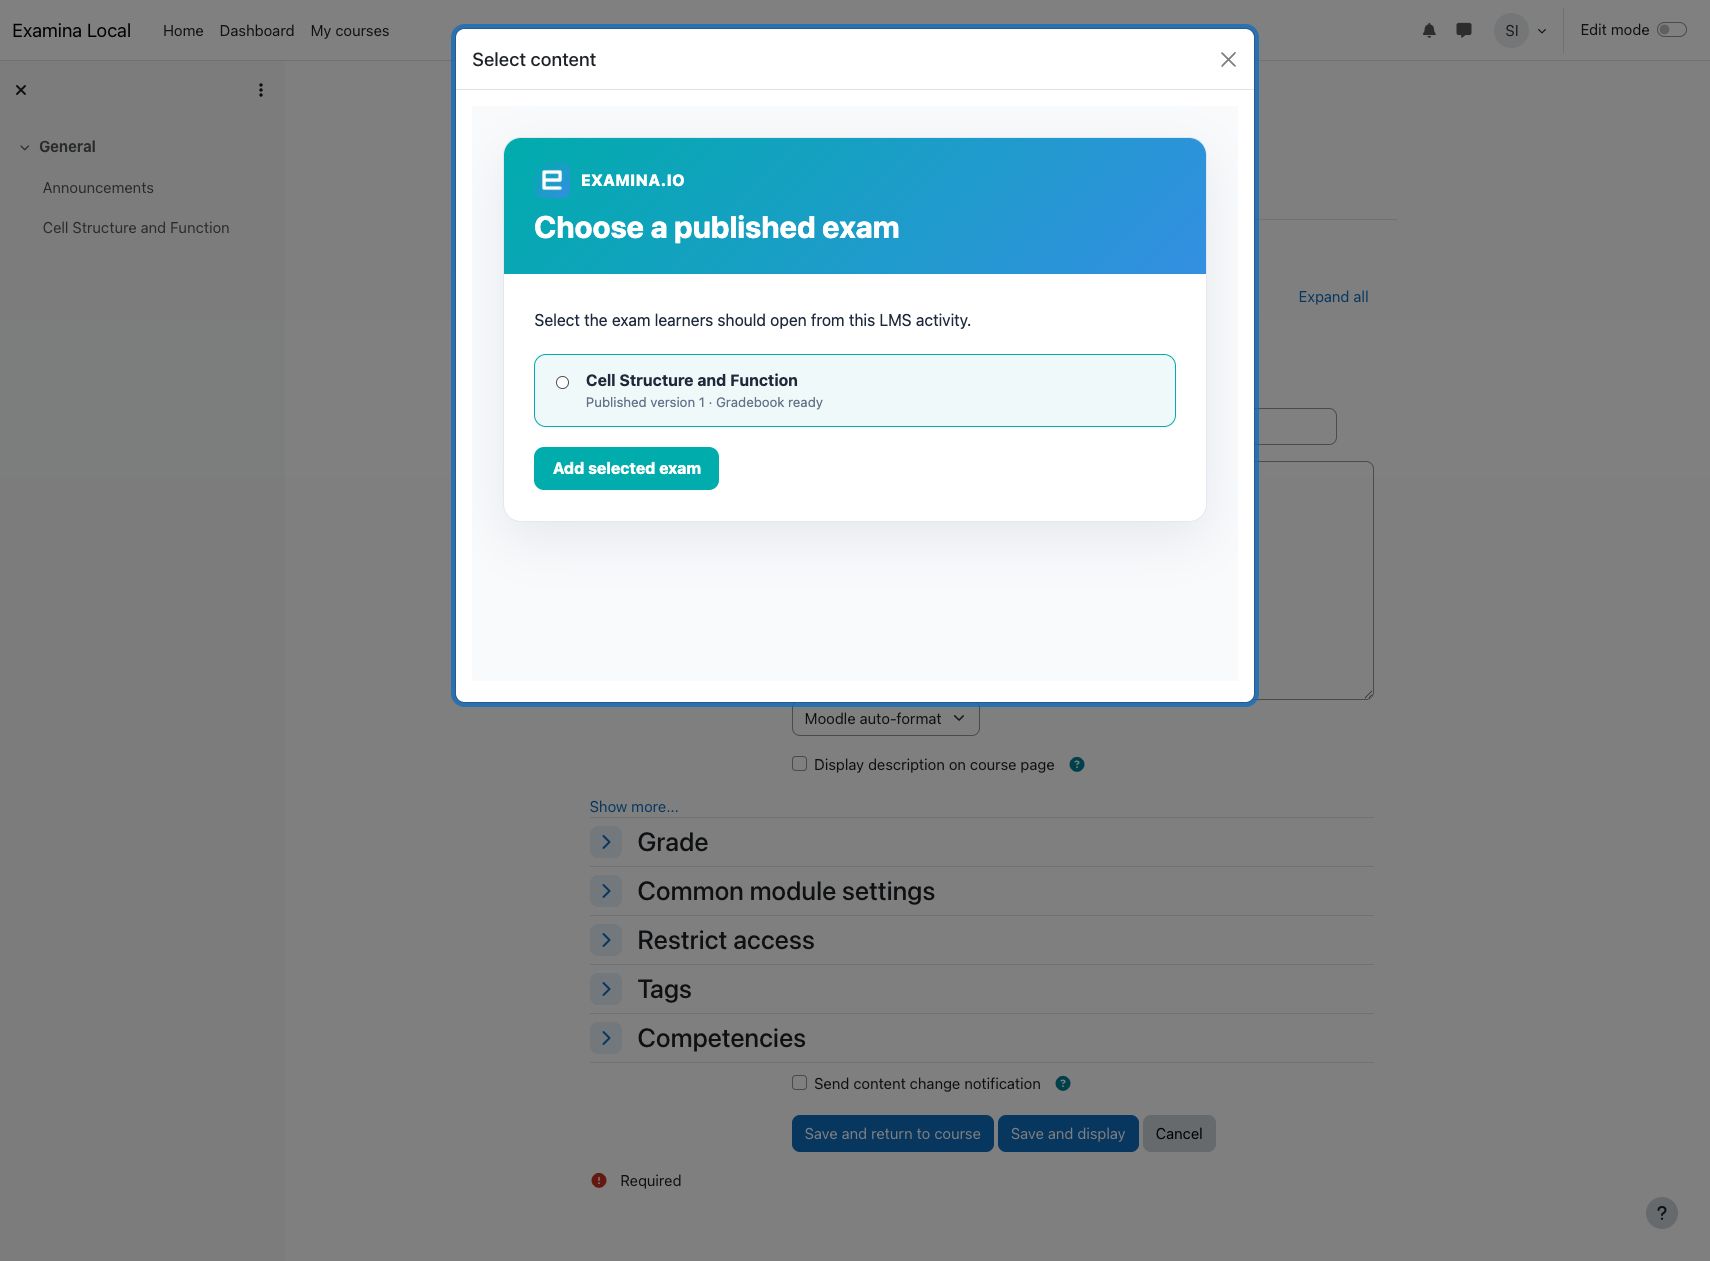
Save the activity and open it once as the teacher. Confirm that the activity shows the correct assessment title and does not prompt for a separate examina.io username and password.
6. Verify the learner experience
Use a fictional learner enrolled in the course for validation:
- Sign in to Moodle as the learner.
- Open the course and select the assessment activity.
- Confirm that the expected exam opens inside Moodle.
- Complete and submit the assessment.
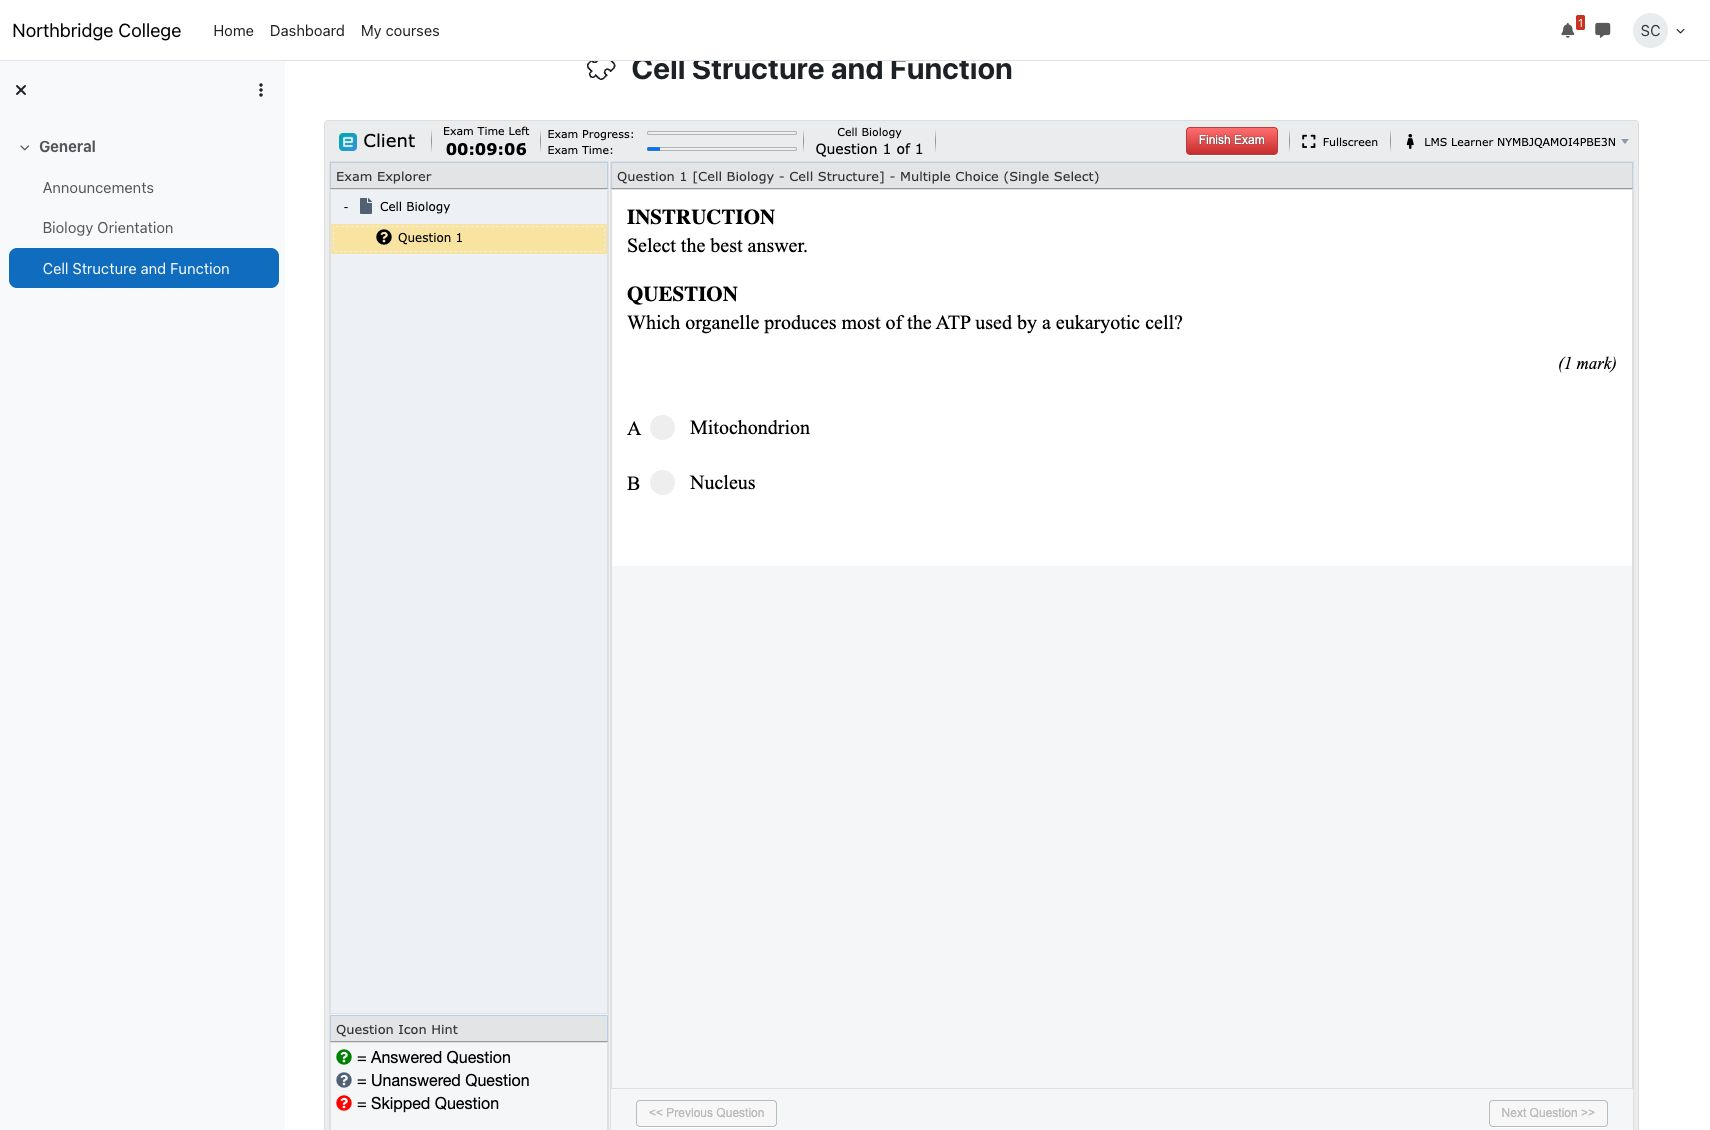
The learner's Moodle identity, course, activity placement, and selected published assessment are verified during the LTI launch. A URL copied from a different course or environment is not a substitute for this launch.
7. Verify the returned grade
After the learner submits, open Grades → Grader report in Moodle. Confirm that the result appears under the correct activity and learner.
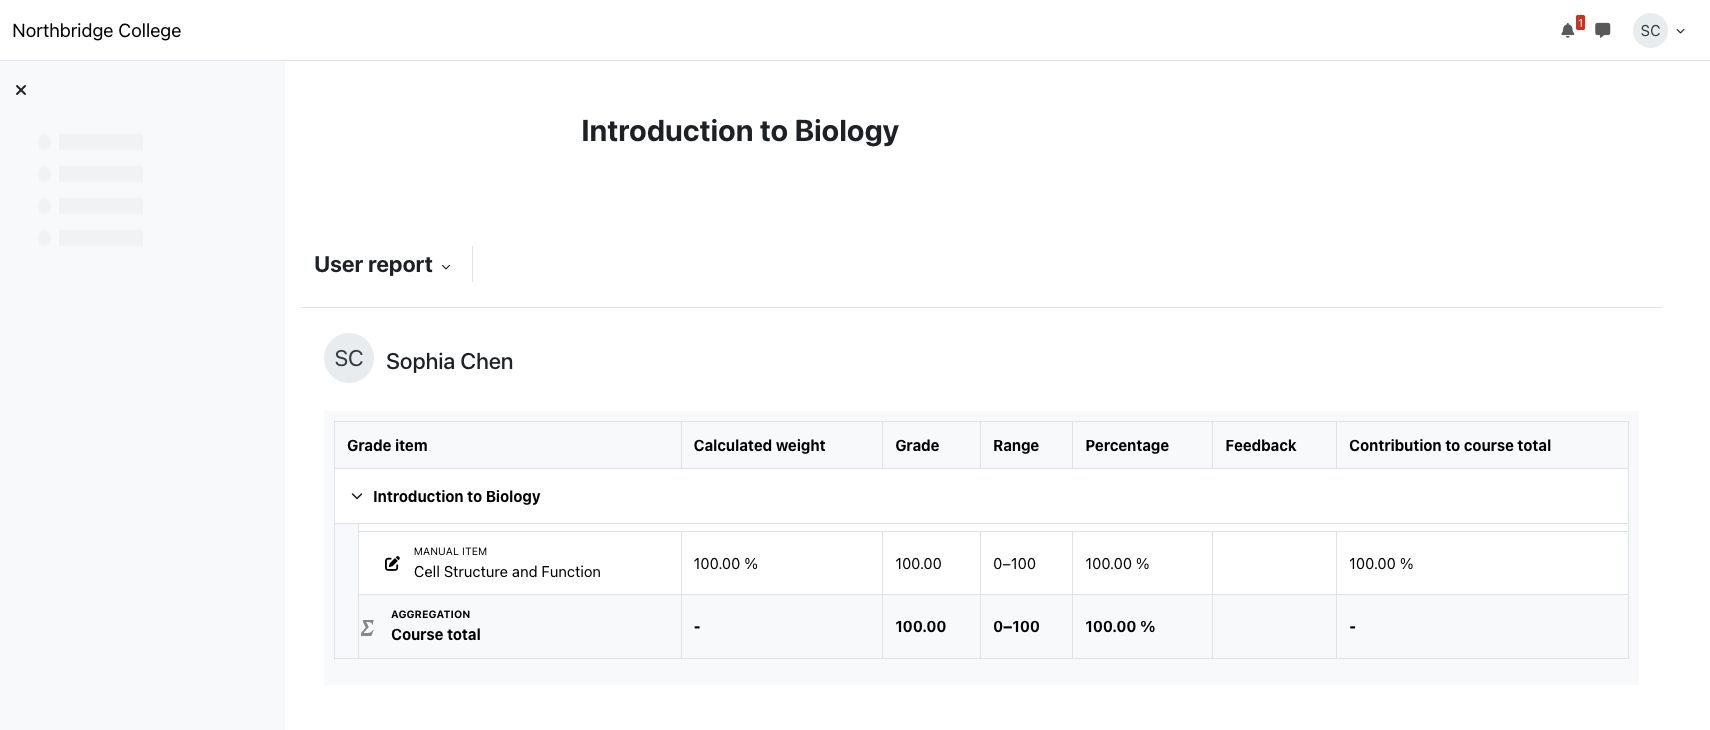
Grade delivery is queued separately from exam submission so that a temporary Moodle outage does not turn a completed assessment into a failed submission. The result may therefore take a short time to appear. Refresh the gradebook before investigating a missing result.
Production validation checklist
Before enabling the tool for a live course, verify all of the following with a non-production course and fictional users:
- The Moodle tool is active and uses the final examina.io endpoints.
- The examina.io registration is active in the correct organization and environment.
- Deep Linking lists only assessments the teacher is permitted to select.
- The selected activity launches the intended published assessment.
- The learner launches from Moodle without a second sign-in.
- A completed score reaches the correct learner and grade item.
- Reopening or refreshing the activity does not create duplicate grade items.
- NRPS is disabled when course-roster access is not needed.
- Both applications use public HTTPS URLs and trusted certificates.
Troubleshooting
| Symptom | What to check |
|---|---|
| Select content is missing | Confirm that the tool is active, Deep Linking is enabled in both systems, the Deep Linking URL is present, and the current Moodle user can add activities. |
| The activity opens a blank page or the launch is refused | Check the issuer, Client ID, Deployment ID, OIDC login URL, launch URL, HTTPS certificate, iframe policy, and browser third-party-cookie restrictions. Ensure no internal Docker or private hostname appears in a browser-facing URL. |
| The wrong assessment opens | Edit the Moodle activity and select the published assessment again. Do not copy an activity between environments without reselecting its content. |
| The grade does not appear | Confirm that AGS and grade acceptance are enabled in Moodle, Grade return is enabled in examina.io, and the activity has a grade item. Allow a short time for queued delivery. |
| Course roster is unavailable | Confirm that NRPS is enabled and granted in Moodle. Assessment launch and grade return can continue without roster access. |
| Moodle reports a key or signature error | Confirm that Moodle uses the registration-specific examina.io JWKS URL, examina.io uses Moodle's current public-key URL, both clocks are accurate, and neither endpoint redirects to a login page. |
For Moodle's platform-side terminology and current menus, see the official External tools and External tool FAQ documentation.