Import an exam into Manager
Manager accepts exam packages exported by Designer as .smex files. Import
the package before adding assignments or sharing an exam link.
Before you import
In Designer, confirm:
- the exam title and code are correct;
- every paper contains the intended questions;
- paper duration and questions-to-answer settings are correct;
- scoring and correct answers have been reviewed;
- instructions and navigation rules are complete; and
- the project has been saved before export.
Keep the source project as your editable master. The exported .smex file is
the delivery package.
Import the file
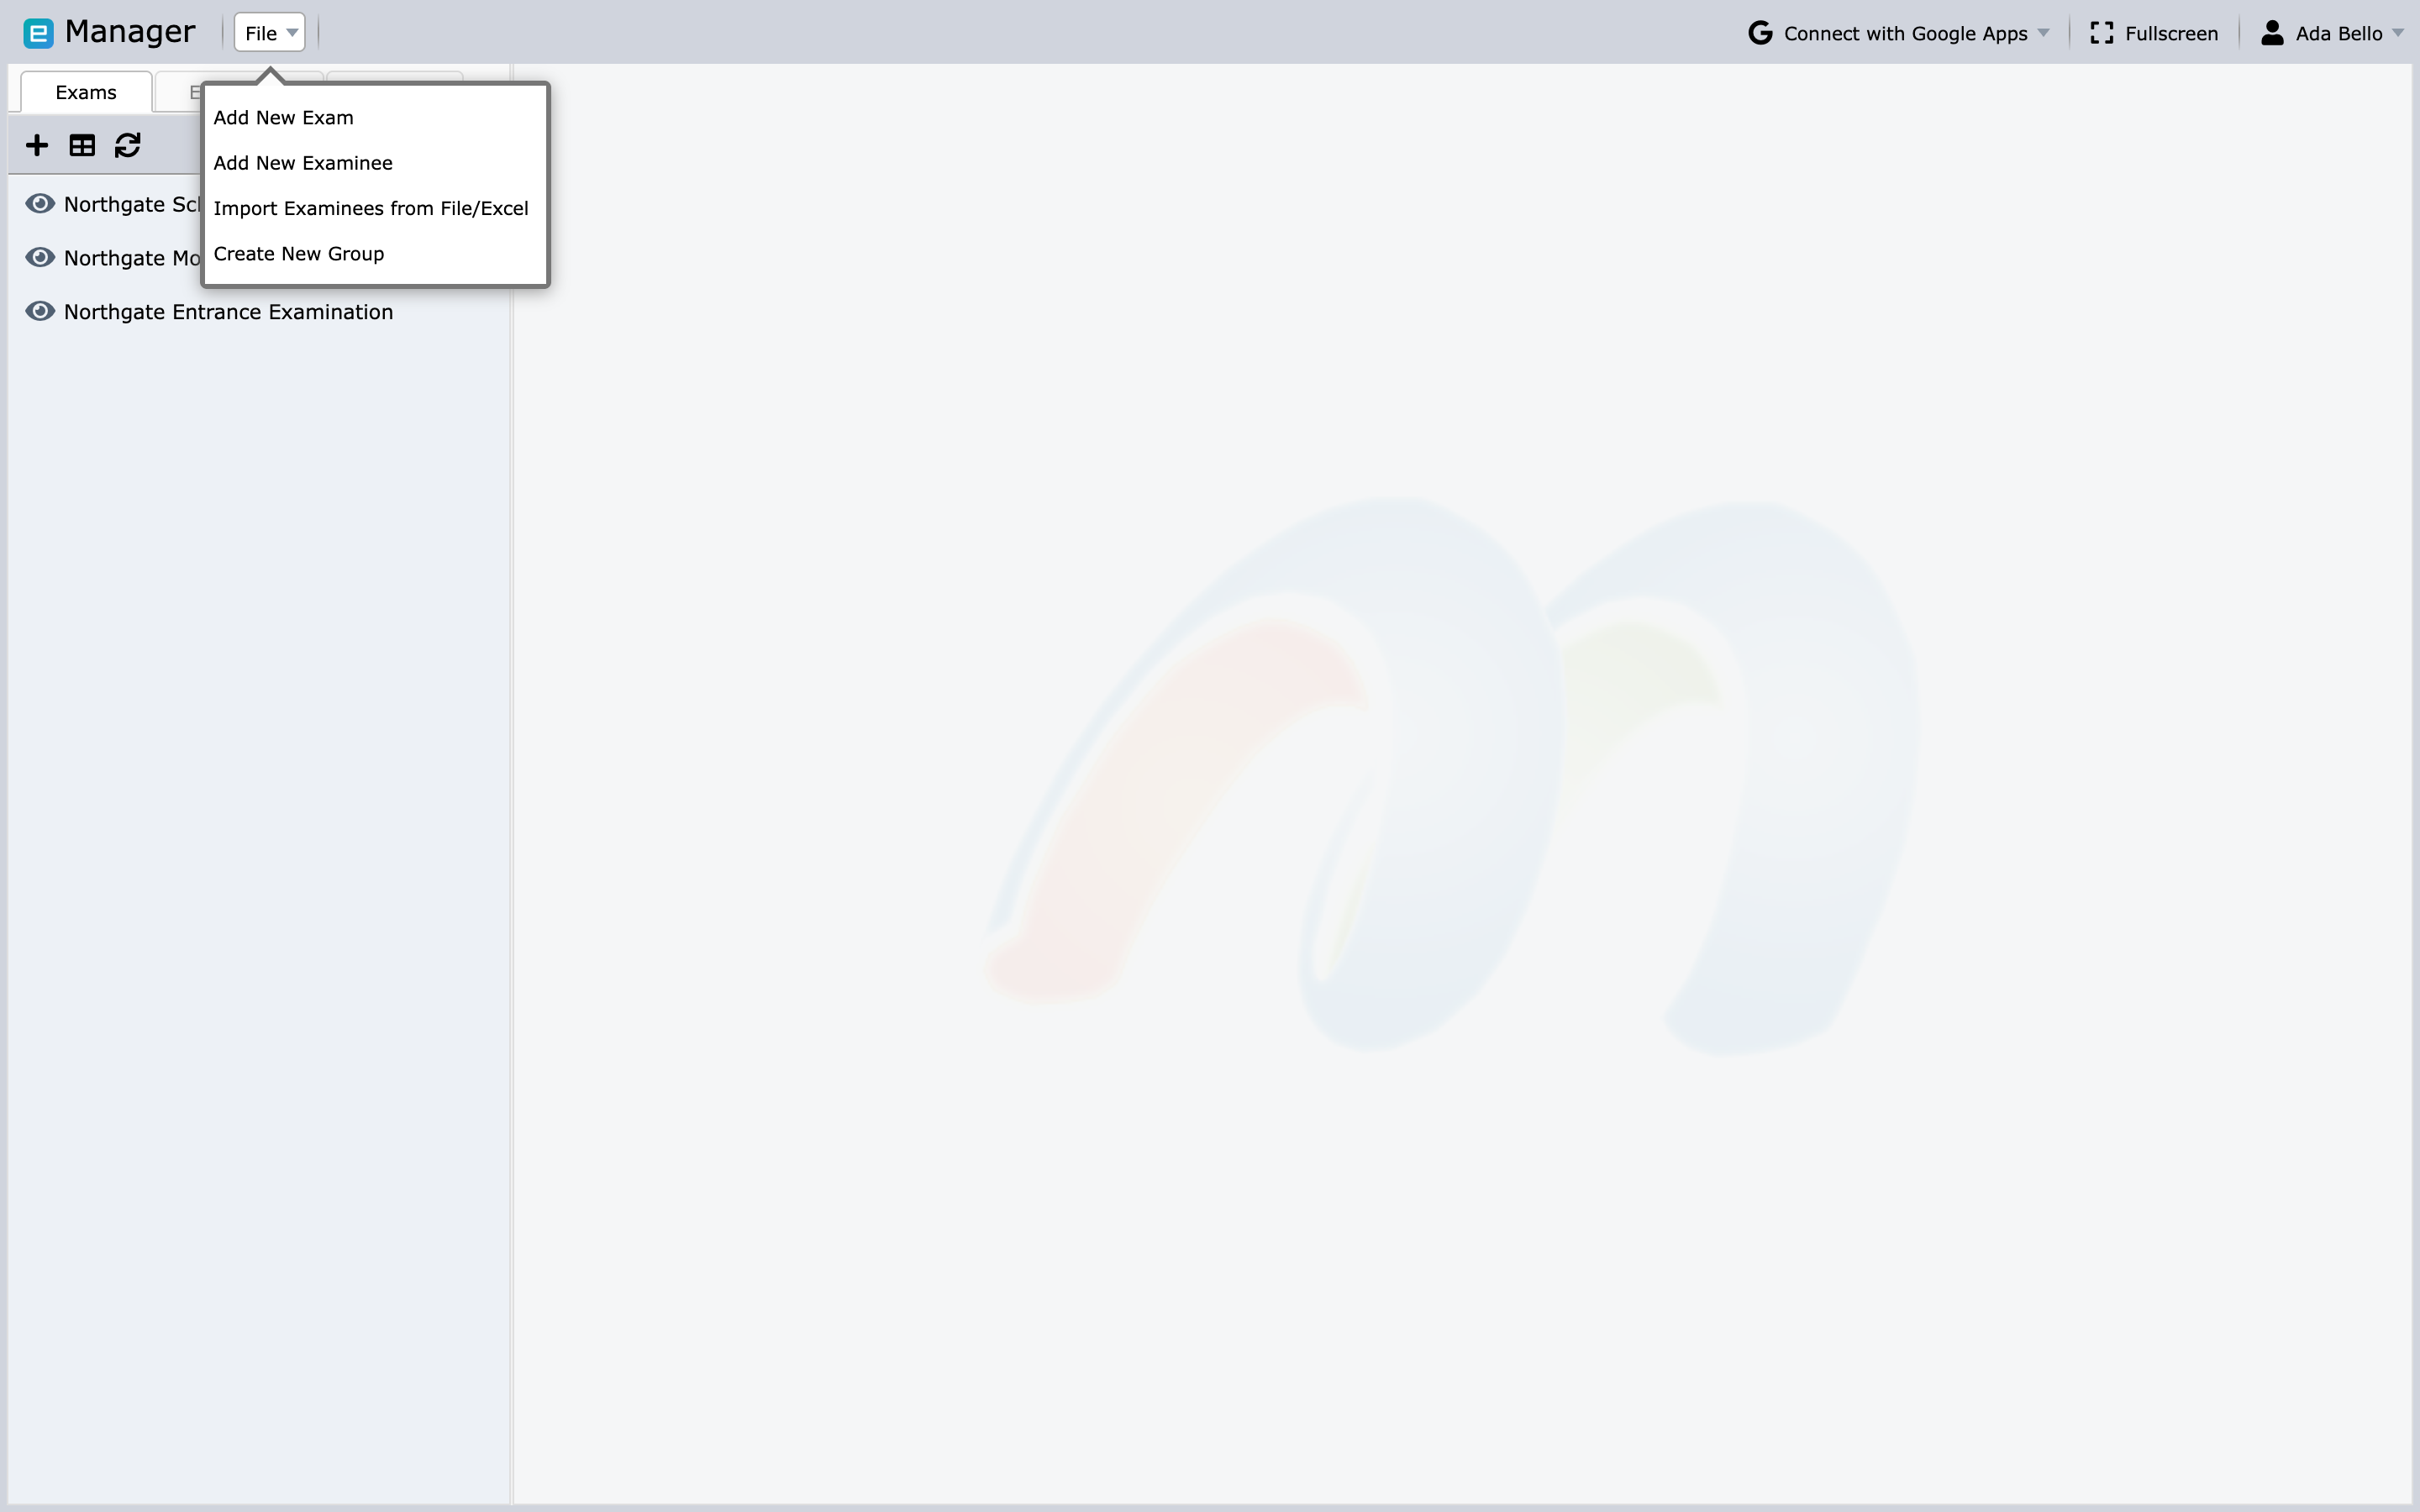
- Open Manager.
- Select File → Add New Exam.
- Drag the
.smexfile into the upload area or select it with the file chooser. - Submit the upload.
- Wait for the success message containing the imported exam code and title.
If Manager reports that the file type is unsupported, return to Designer and
export the exam in the supported .smex format. If the file exceeds the
allowed size for your environment or plan, reduce large media assets and export
again.
Verify the imported exam
Select the exam and review its details panel:
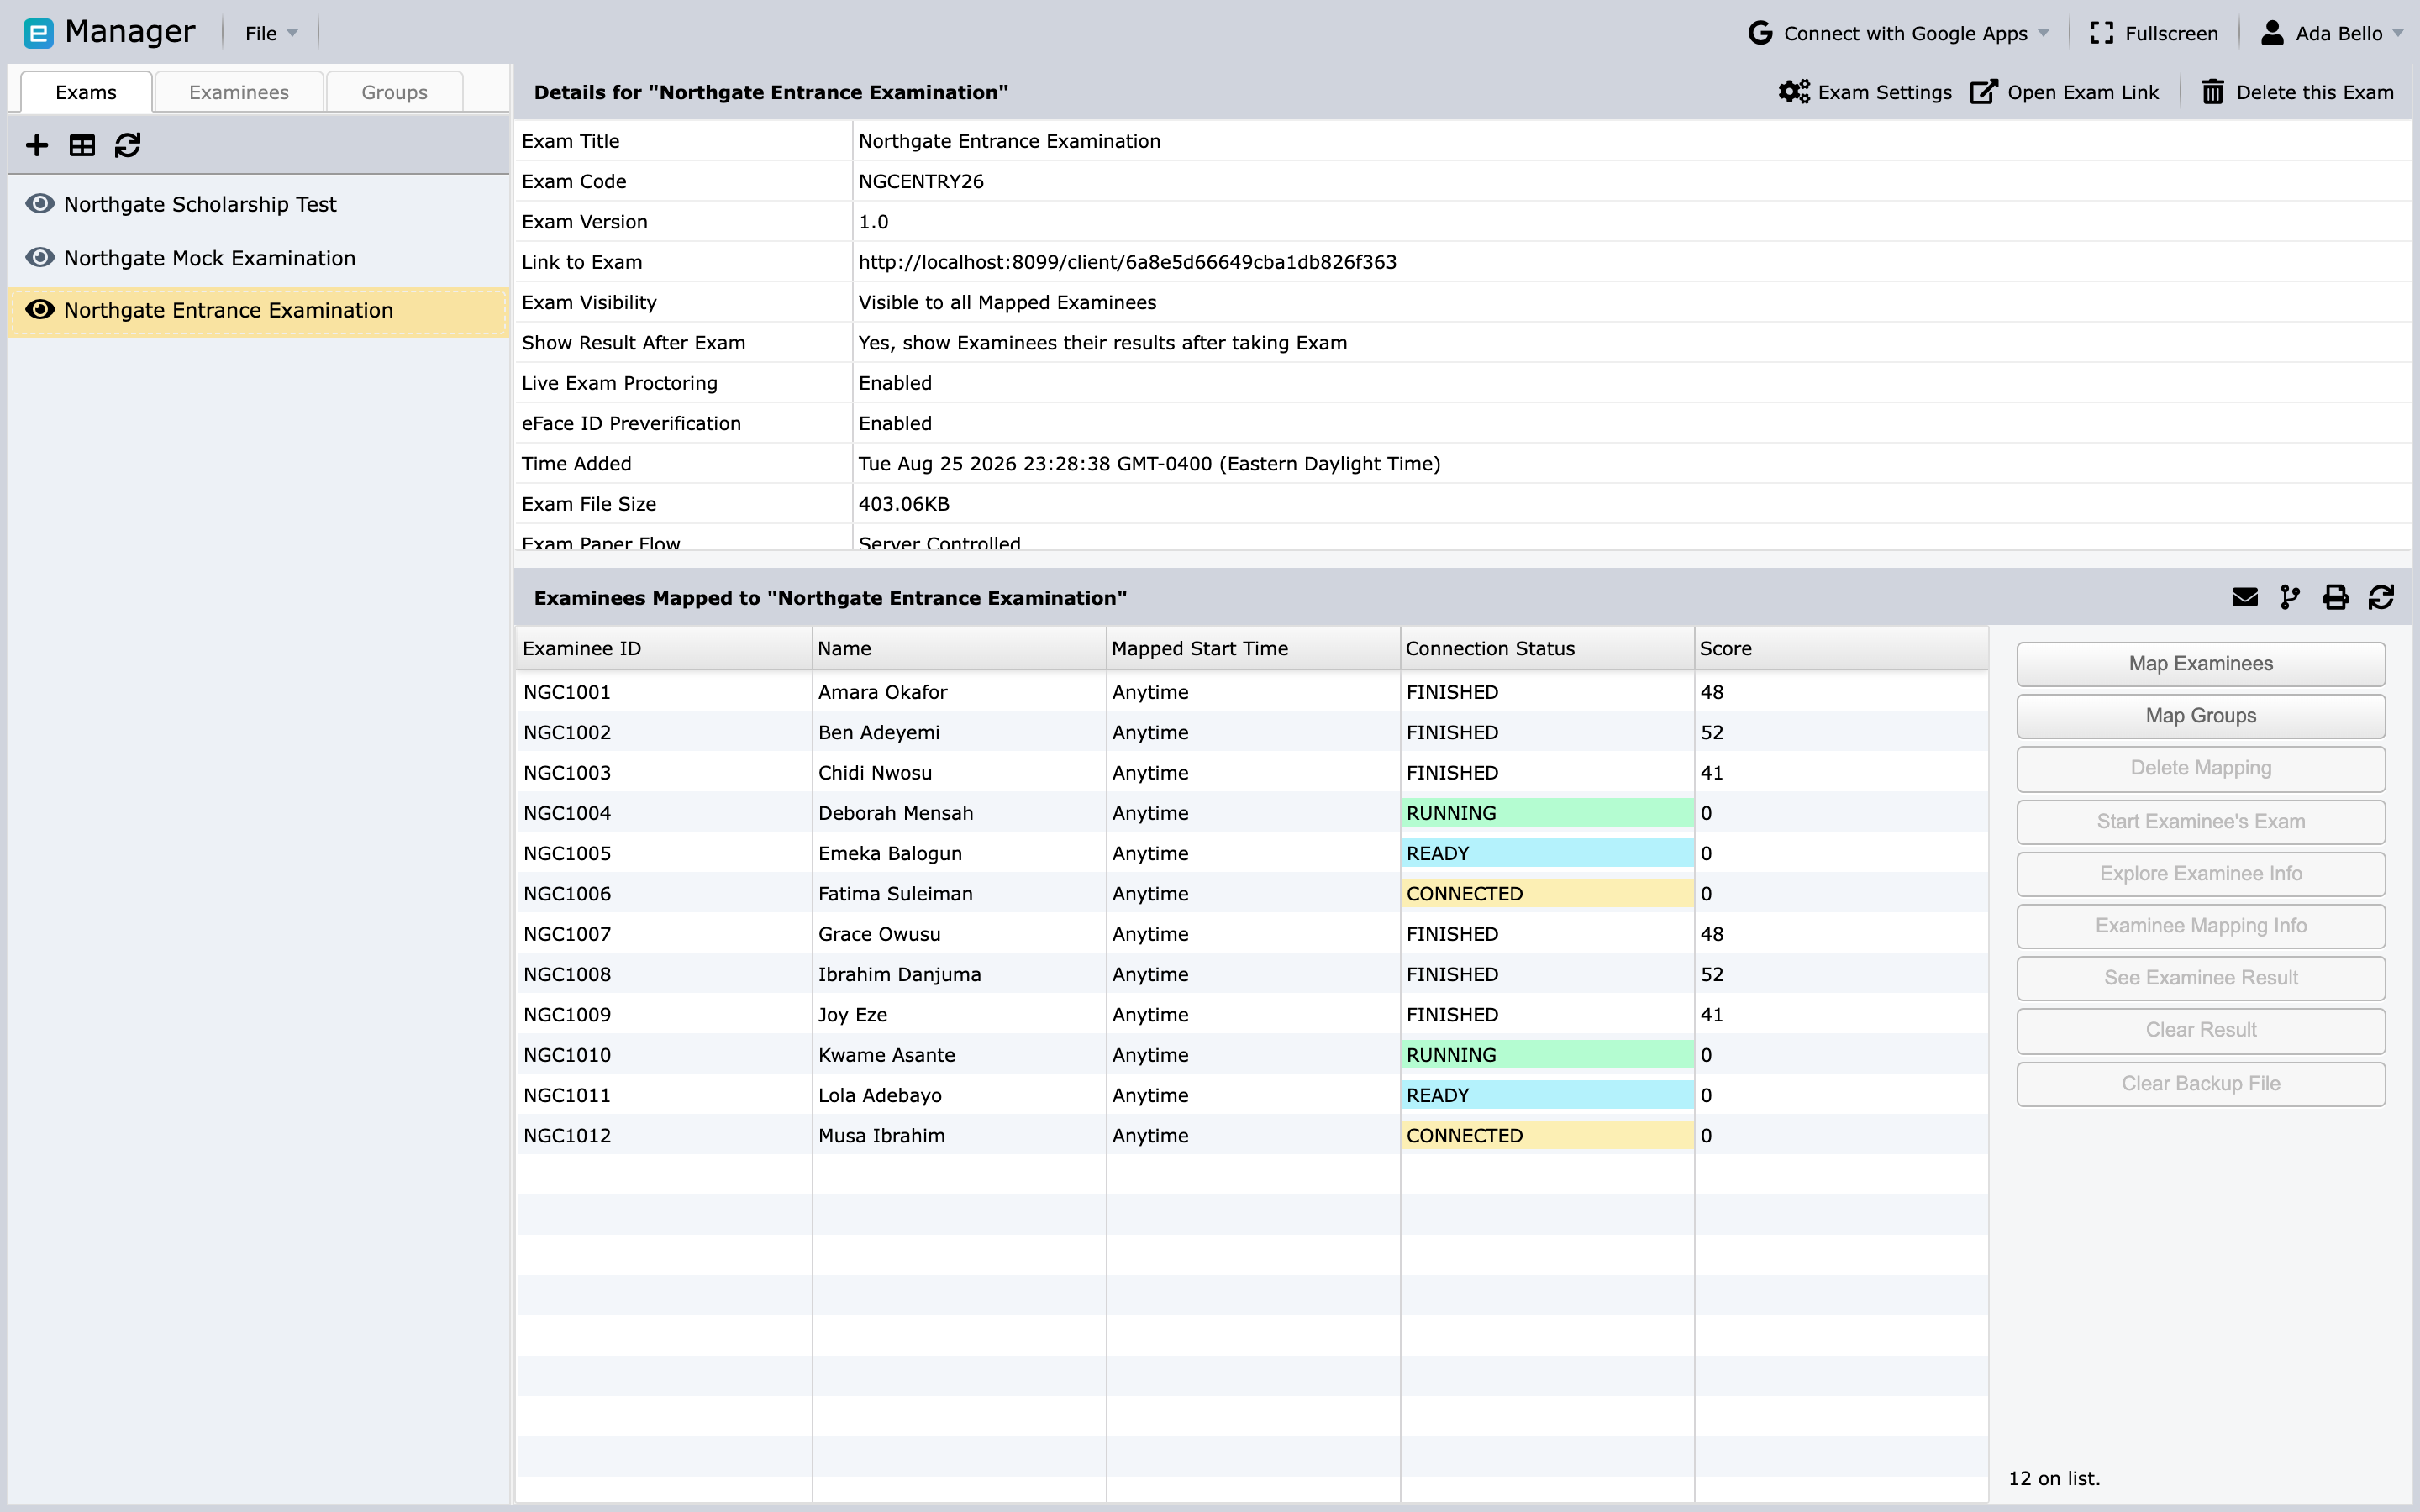
- exam title, code, and version;
- exam paper flow;
- visibility;
- imported file size; and
- the time it was added.
Exam File Size is the quickest sanity check that the right package arrived — a figure far smaller than expected usually means an export that is missing its media.
Open the paper information and compare it with the Designer project. Do not map real examinees until the content and timing are correct.
Update an exam safely
If content changes after import:
- Update and validate the source project in Designer.
- Export a fresh delivery file.
- Import it according to your organization's change process.
- Recheck mappings, visibility, proctoring, and communication before release.
Do not assume that a newly exported file will preserve every delivery-side setting. Verify the Manager record and test the Client journey after any replacement or version change.
Continue setup
Next, add or import examinees, then map people and papers.