Create questions in Designer
Questions belong to a paper and, when sections exist, to one section within that paper.
Add a question
- Open an exam project and create a paper.
- Right-click the paper and choose the new-question action, or select New Question below Exam Explorer.
- Choose a question type.
- Enter the prompt, answer choices or accepted answers, and optional explanation.
- Set the question properties.
- Open Preview and check the result.
- Save the project.
Question types
Designer supports:
- Multiple Choice — single select: one option is correct.
- Multiple Choice — multiple select: more than one option can be correct.
- Fill in the Blank: the examinee enters text that is evaluated against the configured answer rules.
Choose the type that measures the intended skill. Do not turn a multi-answer item into single select merely to simplify marking.
Core properties
Option Count
: Sets the number of multiple-choice options. The supported range is 2 to 10.
Correct Option
: Identifies the correct answer for a single-select item. Multiple-select items allow the applicable correct choices.
Allow Shuffle Choices
: Randomizes option order in Client while preserving which option is correct. Avoid shuffling choices such as “all of the above” that depend on position.
Question Section
: Assigns the question to one section. Create the required paper sections before assigning questions.
Question Score/Value
: Sets the mark awarded for the question. Decimal values such as 0.5 are supported.
Case studies and passages
Enable Add Case Study/Passage when a prompt depends on shared reading material, an exhibit, a scenario, or a problem statement. Use Case Study Label to replace the default label with a clearer name such as Comprehension Passage.
If several questions use the same passage, keep the wording and formatting consistent and preview each question.
Edit and preview content
The Edit pane supports text formatting, headings, colour, lists, alignment, superscript, subscript, symbols, expressions, images, audio, and tables.
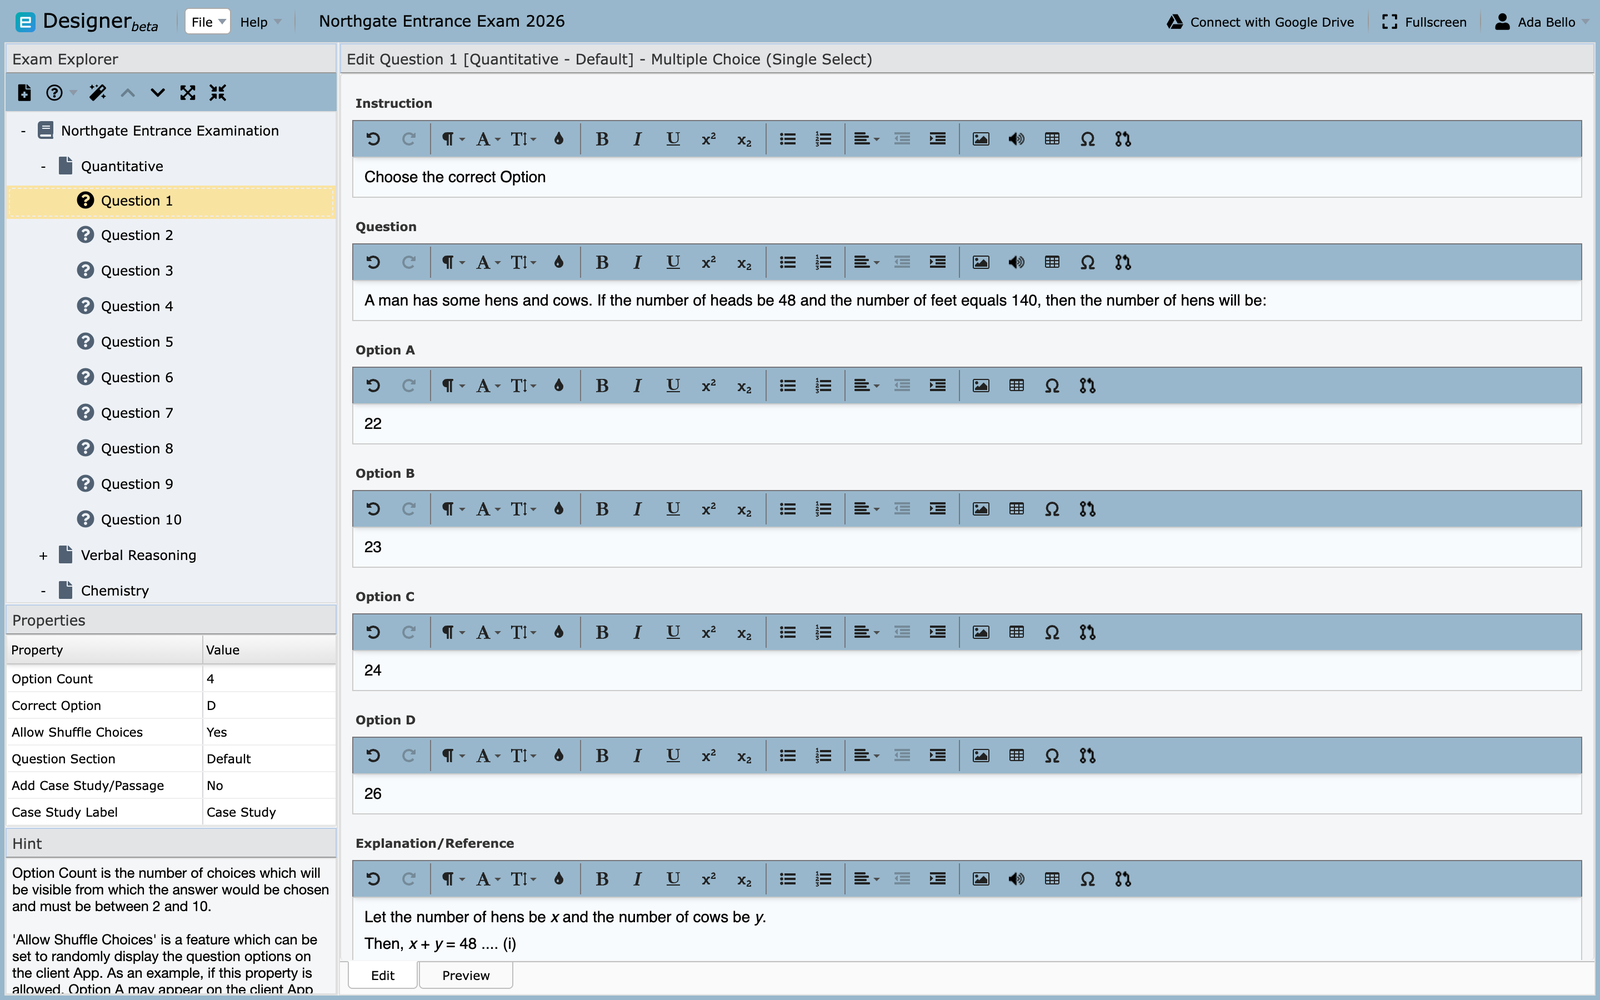
Use formatting to improve structure, not decoration. Confirm that important meaning is not communicated by colour alone.
Images
Keep an imported image within the limits shown by Designer. The existing editor guidance recommends no more than 650 pixels wide and 500 KB so the image renders reliably across desktop and mobile devices.
Resize and compress large images before import. Add enough wording in the question for the image's purpose to remain understandable.
Audio
Audio items can support listening questions. Configure the available volume, pause, stop, and seek controls to match the assessment rules.
Test with headphones and the lowest bandwidth expected on exam day. Provide an approved accommodation path when required.
Tables
Use the table tool to add rows and columns.
To edit or remove a table, right-click inside it and open Table Properties.
Keep tables small enough to fit supported screens without horizontal scrolling.
Preview and quality check
Select Preview to inspect the rendered prompt and options.
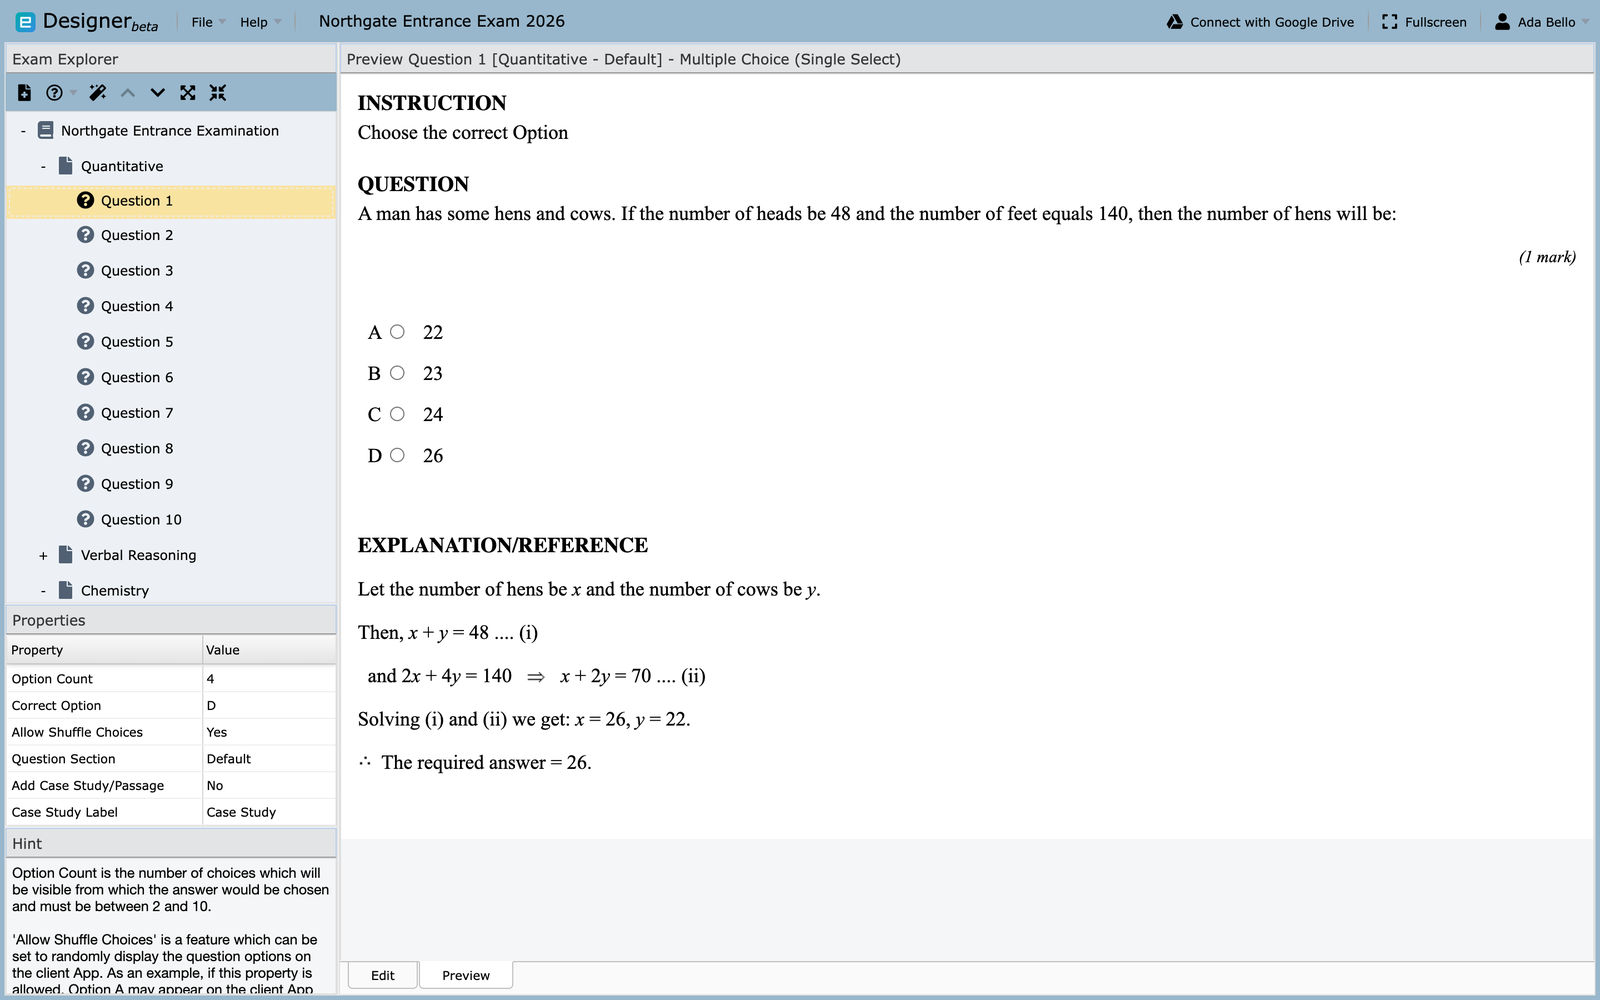
Before export, verify:
- the prompt has one defensible interpretation;
- the correct answer and score are set;
- distractors are plausible and not accidentally revealing;
- section assignment is correct;
- shuffled options remain meaningful;
- media loads and is readable or audible;
- spelling, grammar, and mathematical notation are correct; and
- the question works at the smallest permitted screen size.
To reuse existing content, see Reuse project content. To bring questions in from a document or another project, see Import existing content.